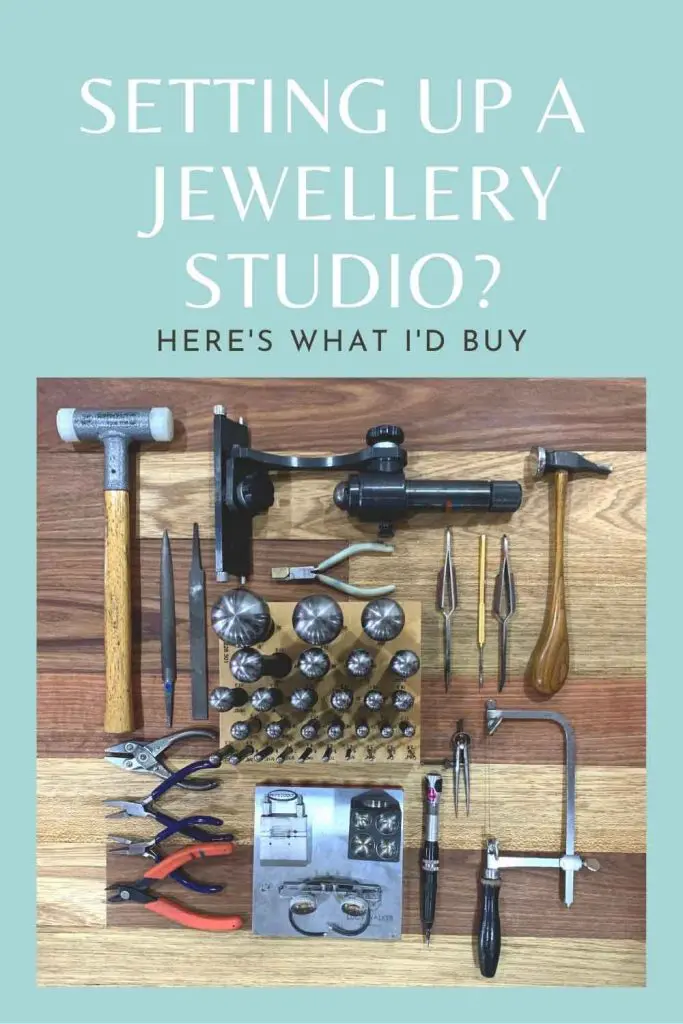
Jewellery soldering tips
The thought of soldering was a block for me starting out making jewellery. I felt intimidated at the mere thought of it to begin with. And then when I finally started getting into it, I kept hitting block after block, for the simple reason: I didn’t know the basic “rules”. And so this is what I want to share with you in this post, think of it as a troubleshooting guide, because if your solder isn’t flowing, it’s quite likely it’s down to one (or more) of the reasons listed below.
1. Clean metal is a must
And when I say clean, I mean spotless. If grease, grime, tarnish or any other residues are present on the surface of your metal, your solder will struggle to flow.
Ever had a time when everything was clearly up to soldering temperature and the solder should have flowed, but instead, it just balled up and glowed like a miraculous ball of mercury? Most likely, that happened because your metal wasn’t clean. Think about how water sits on a greasy dinner plate – it doesn’t go anywhere. The same is true of solder too. When in doubt, give the surface of the metal to be soldered a quick sanding with 1000 grit sandpaper.
2. Pre-heating helps with larger pieces
Silver is a highly conductive metal. So are brass, bronze and copper for that matter. What this means is that when soldering larger pieces, no matter where you focus your flame, the heat will conduct quickly from that spot to the rest of the metal.
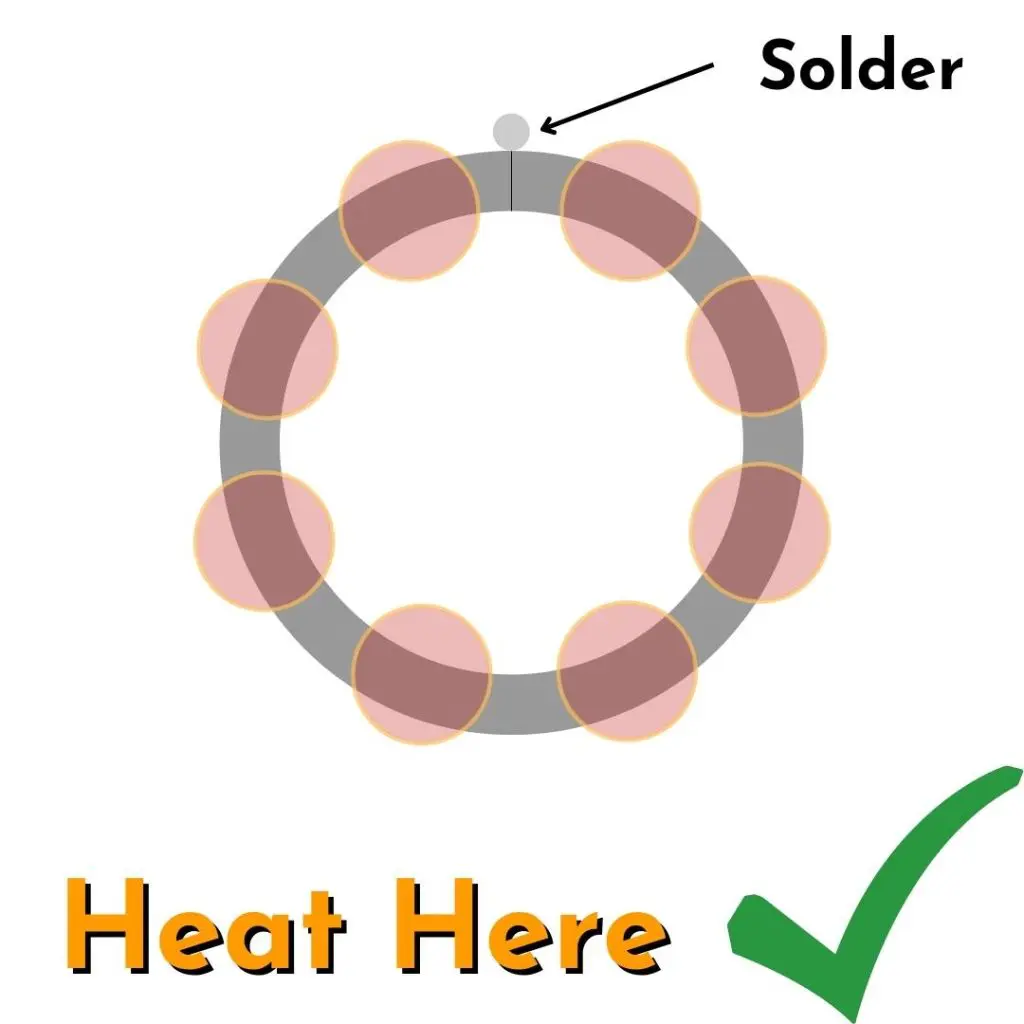
As far as soldering is concerned, let’s think of a ring band. It simply means that we have to do a certain amount of pre-heating with our torch to bring the whole ring up to a temperature close to that at which the solder will flow. The whole ring definitely doesn’t need to reach soldering temperature for the solder to flow, but heating the whole ring initially will make getting the join to the right temperature a hell of a lot easier.
When soldering a ring band for example, I’ll first heat the whole ring band evenly, before moving my flame towards the solder join and focusing on heating the area around the join until the solder flows.


3. Roll (or hammer) your solder
Urm what the hell for? (yeah I hear you). There are actually a couple of reasons:
1. Thinner solder is easier to cut – I use a pair of cheap Ikea scissors with no problems to cut my solder.
2. Thinner metal melts quicker than thicker metal (and solder is just metal) – thinner solder will flow faster than thicker pallions.
3. You’ll end up using less solder this way (which is a good thing if, like me, you’re not a fan of sloppy solder joins).
To learn how we prepare and store our solder for use CLICK HERE for a short (4-minute video) explaining everything!
4. Always use flux – and be generous
Because solder will not flow on a dirty surface, when soldering gold, silver, brass bronze and copper, we must use a substance called flux to protect the area being soldered from oxidisation. But what is flux? Basically, it’s a borax-based glass-like substance that forms an airtight barrier around your solder join when heated – so for a certain amount of time, it stops oxidisation and therefore your solder will flow.
My preferred flux for jewellery soldering is usually paste flux, as it lasts longer under heat. When soldering copper, brass or bronze which oxidise quickly, I always use Handy Flux by Lucas Millhaupt – and I’ve tried a lot of fluxes!


For smaller jewellery soldering operations, I often prefer to use a liquid flux because it bubbles less and is easier to apply. My current favorite is the new Prips style flux from Pepetools which comes in at a great price and with its own spray bottle for easy application.
TOP TIP: For precarious soldering operations, where applying flux with a brush could accidentally move components out of alignment – use a spray bottle.
Spraying the flux over the entire piece when soldering can also act as a barrier to help stop the fire scale.
5. Heat the metal to be soldered, not the solder directly
The aim of the game when soldering is to bring the metal to be soldered up to the temperature that the solder will melt, so that the heat transfers to the solder and the solder flows cleanly into the join. If we get the solder up to soldering temperature, but not the items to be soldered, then our solder will simply form into a molten ball but will not flow into the join.

6. A tight join is imperative
Silver solder isn’t glue, it doesn’t simply attach two pieces together with a layer of solder. The solder itself diffuses into the crystal structure of the metal to create (when done correctly) an exceptionally strong join. But strong joins can only be achieved when the metals to be soldered are fitting together perfectly.
Not only does having a tight fit ensure a stronger join, but it allows capillary action to take place when the solder melts and sucks the solder directly into the join, rather than flow anywhere it pleases.
If you want to be sure your solder join is absolutely perfect, checking through a loupe can be immensely helpful (especially if you’re getting on a bit like me – and those eyes aren’t as good as they used to be!).


7. Getting a perfect join doesn't need to be complicated
The easiest way to get a perfect join on a ring band is to simply saw directly through the join.
But, for larger things, such as bangles or hoop earrings, this can be a little difficult (and I can’t say I haven’t chomped into my finger trying this). In this case, I prefer to use pin hole sanding disks attached back to back on a screw mandrel. I like to support the piece on the bench pin, pull one side to allow the join to spring open just enough to fit the sanding disk and then release the pressure on the join as the disks rotate.


7. Solder flows towards the hottest point
For this reason, it is imperative to make sure both surfaces to be joined reach the soldering temp at the same time. For something like a simple ring band, this just involves evenly heating the piece – easy peasy.

However, when soldering a tiny jump-ring to a large pendant, for example, things start to get a little more melty.
It’s simple really though, if the pendant is 10 times heavier than the jump-ring, it just needs 10 times more heat. What that looks like in reality is spending most, if not all of our time, heating the larger piece until the solder flows. If we spend an equal amount of time heating our jump-ring and our pendant to the left, well, we won’t have a jump-ring for very long.
8. Be aware of heat-sucking assholes
I’m talking about your tweezers, third hands or even soldering screens. These can all transmit heat away from the area being soldered. When soldering anything that must be held in tweezers, hold the piece as far away from the solder join as possible. If it’s not possible to hold the piece this way, pre-heating your tweezers before soldering can be a big help.


9. Size matters
The size of the surface area being joined that is. Let’s think about a ring made from round profile wire being soldered to the back of a bezel setting. If the ring band is soldered as it is to the back of the bezel, there is only a minuscule amount of surface contact between the two pieces, this will not amount to the strongest solder join possible.
Another example is pictured below. Simply soldering a tube to the side of a pendant will work, however the join will be much cleaner and stronger if we file a slight recess to match the curvature of the tube.


10. Use solder balls where possible rather than solder chips
Because a solder ball has hardly any contact at all with the metals to be soldered, when the solder flows, capillary action will pull the molten solder straight into the join with very little resistance. If you’ve ever found solder paillon shadows when soldering a bezel to back plate, try using solder balls instead, you’ll notice a big difference.

11. Spend a little extra time setting up
Spending a little time to ensure everything is set up perfectly for soldering will save time from fixing mistakes in the long run.
Don’t rush setting up, take the time to ensure everything is perfectly aligned before you even think about lighting the torch. The head and shank tweezers pictured to the left are a big help when it comes to soldering rings.

12. Learn to use a solder pick
Simply put, it will speed up and simplify jewellery soldering to no end. It might take a little practice to get used to, but I promise it’s worth a little struggling. Watch the quick video below to see just how easy it makes soldering!
13. Don't be afraid of larger flames
If you’re taking into consideration everything mentioned above and your solder still isn’t flowing, it could simply be because you don’t have enough heat. Keeping a neutral flame, just make it a little larger and give it another try.
Do be aware that while the hottest part of the flame is the tip of the inner blue cone, the area directly behind that is almost just as hot. Just a few mm to the left or right however you’ll see the flame cools significantly. If you need a visual representation of just where the heat is, hold your solder pick in the flame, move it side to side, and backwards and forwards slightly and watch as it goes from glowing bright where it’s the hottest to where it cools back down.
14. Cheap work holding tools work a treat
Don’t get too obsessed with having all the latest work holding solutions for soldering. Most of the time I’m laying things flat on my charcoal block, or using a cheap pair of soldering tweezers.
Soldering tweezers can however lose their shape pretty quicky. That is a pretty easy fix as you can see in the video!
Ready to dive in and create your own professional looking jewellery?

Join the Metalsmith Academy today and you’ll have access to all the classes you need to get up and running making professional looking jewellery with confidence – all filmed with your viewing pleasure in mind. According to our students, our videography is the best out there!
You’ll also be able to ask questions on this class and others in our active community forums where Lucy and Vennice are personally available every single day.
Curious about what’s happening at the Metalsmith Academy, but not quite ready to join? Sign up below to take a peek the classes available, resources, and all the magic we have to offer! As a welcome gift, we’ve prepared some incredibly helpful free resources that you won’t want to miss.