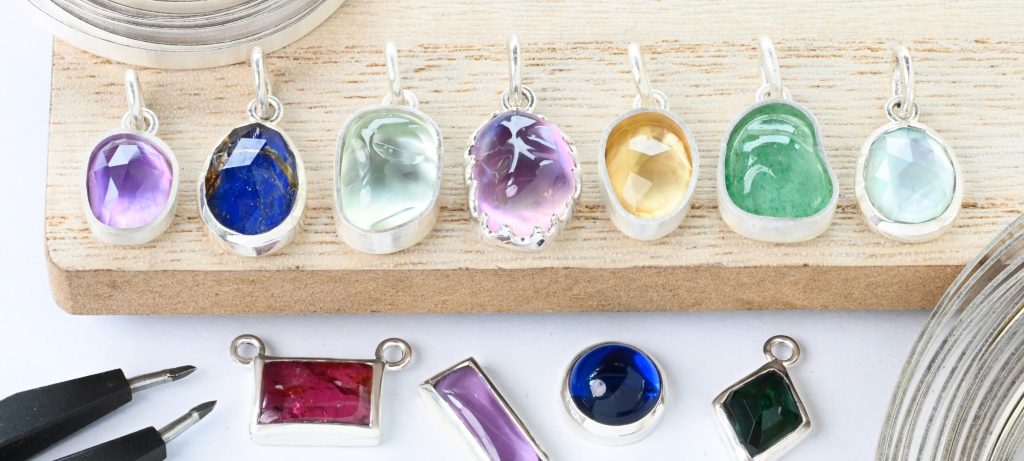
The toughest part of bezel setting isn't the setting itself, but ensuring the bezel is the perfect fit for the stone and the correct height.
I always say bezel setting is a bit of a game of trial and error, and honestly as with everything creative, it will always involve screwing things up a few times before getting it nailed. But in this blog post, I wanted to share some tips and tricks to help shorten that learning curve.
I’ve said before that I can’t give you the exact bezel heights for every stone out there, and even if I could, you couldn’t measure it anyway. But you know me, I get thinking after making a statement like that, and I realized I was being a dramatic dick. I know I can’t do all the stones, but what I can do is take pictures of various situations for lots of different stones to hopefully help give you a solid idea. And I promise to keep adding to this one as I set more and more bezels.
And so, I really hope you find this helpful, because I’ll be honest, I wasted a shit tonne of silver making all these demo bezels. Still, I’m sure my friends are gonna have a field day claiming them!
Let's start with the basics before we dive in to the details.
The first thing we need to clarify is that the height of a bezel isn’t related to the height of the stone at all. It’s related to the curvature of the cabochon when we look at it side on.
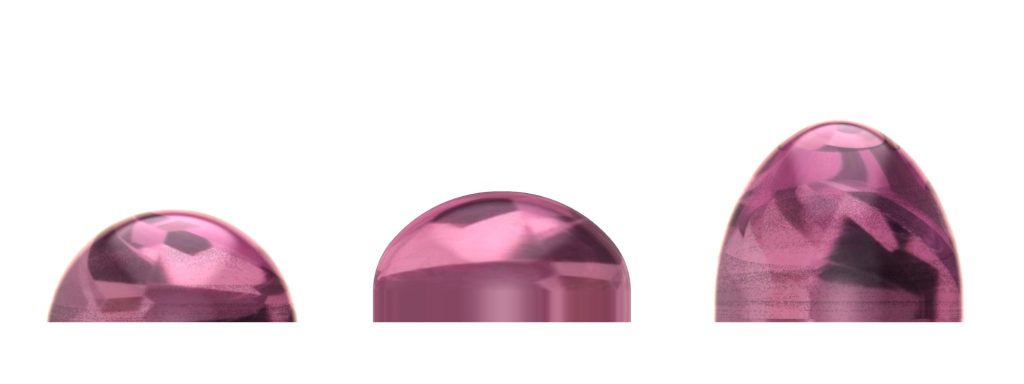

The stones pictured above are all the same diameter. But if you look at the profiles of the stones, you can see the curvature of the cabochons is quite different. The bullet shaped cabochon on the far right is much taller than the cab in the center, but the profile of the curve starts right at the very base of the cabochon. Whereas the center stone starts out with vertical sides right at the base, before starting to curve at approximately 1/3 of the height of the stone.
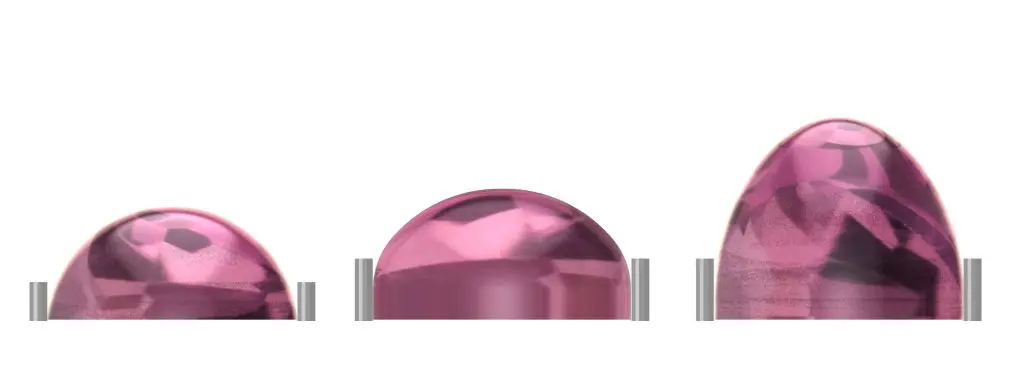

Even though the stone on the far right is considerably taller than the center stone, the bezel height required to secure both stones securely is just about the same.
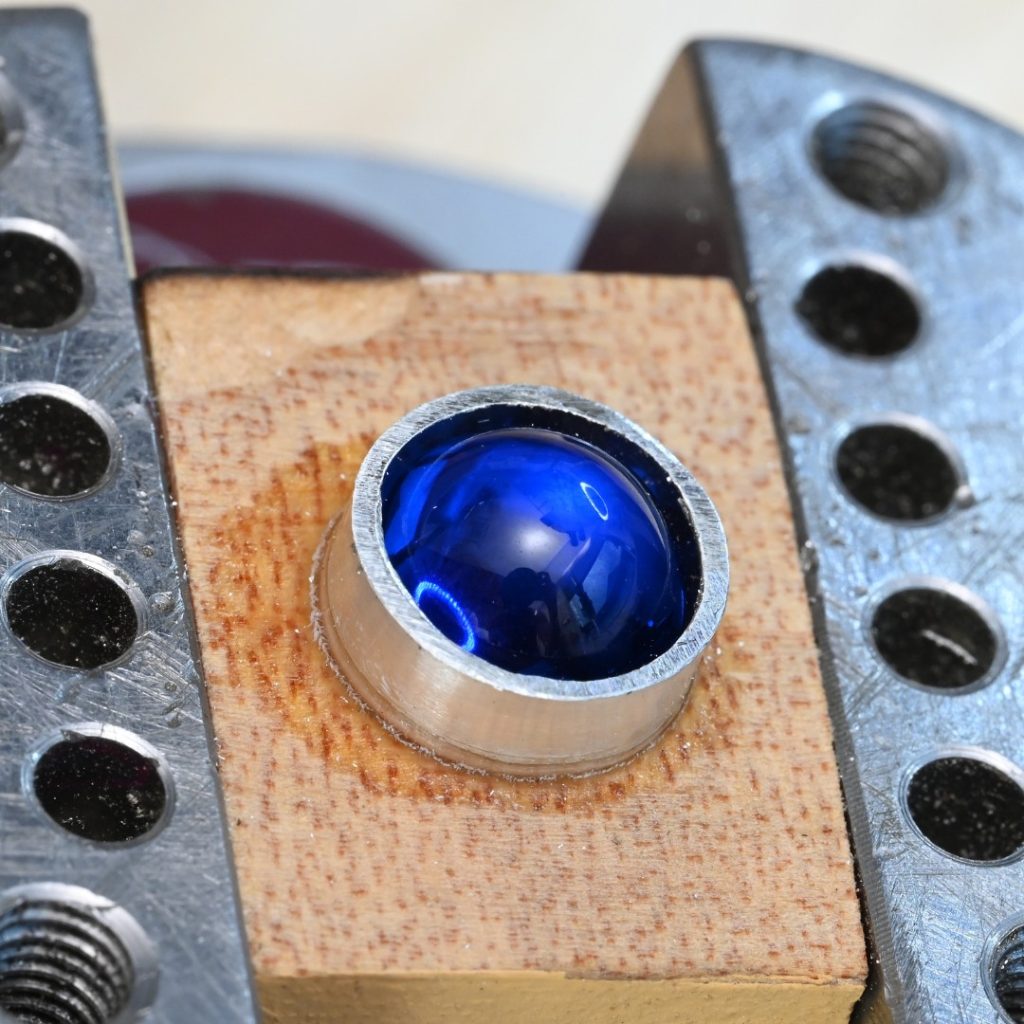
If we make the bezel too tall...
You’ll find it really difficult to get a secure and smooth setting. You could probably make this work with fine silver, but with sterling silver it would simply be too difficult to move the metal over the stone. Even with fine silver, the metal will likely fold over on itself or form ripples that are impossible to get out later.
Aside from being difficult to set, we also cover a lot more of our stone than necessary – sometimes there may be a design reason for doing this, but generally speaking we always want to show off as much as the stone as possible, whilst ensuring it’s securely set.

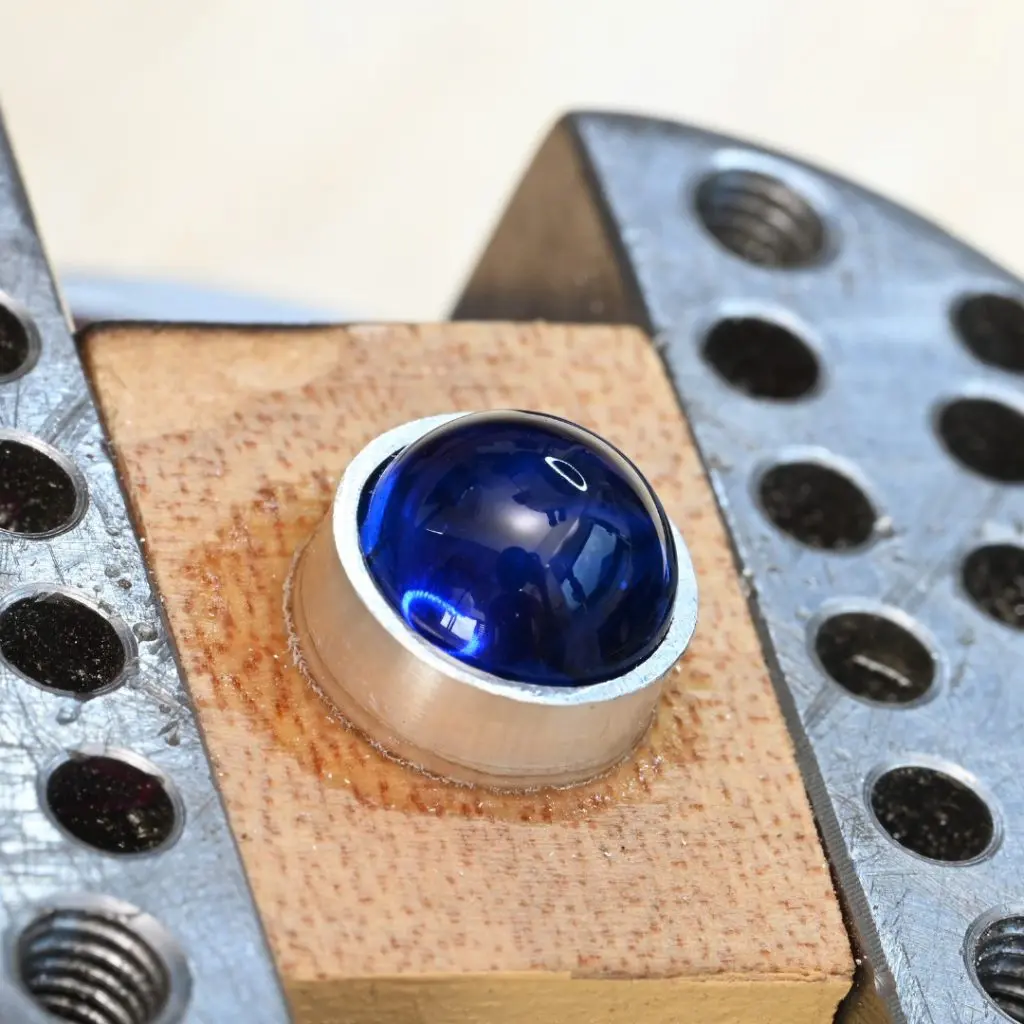

If we make the setting too short...
Simply put, we don’t have enough metal to hold the stone securely in place. This means either immediately, or even worse, when the customer is wearing it, the setting will fail, the stone will fall out, and you’ll be left feeling like a bit of a knob.
In my opinion, it’s better to have a bezel that is slightly too tall that holds the stone securely and neatly, than to have a bezel that is too short. So, when just starting out with bezel setting, I’d say the main thing to avoid is making the bezel too short. But let’s take a look at getting it just right.
The elusive Goldilocks zone
When you get the bezel height just right, setting becomes infinitely easier. Anyone taking our classes will tell me I sound like a broken old record, but it really is worth taking the time to get the bezel height perfect, as well as getting the bezel well-finished before setting the stone. Time spent at this stage will mean a lot less stress later on.
Knowing the right height to file your bezel to is going to take a little practice. So further on down we’ll take a look at a few more examples. But first…..
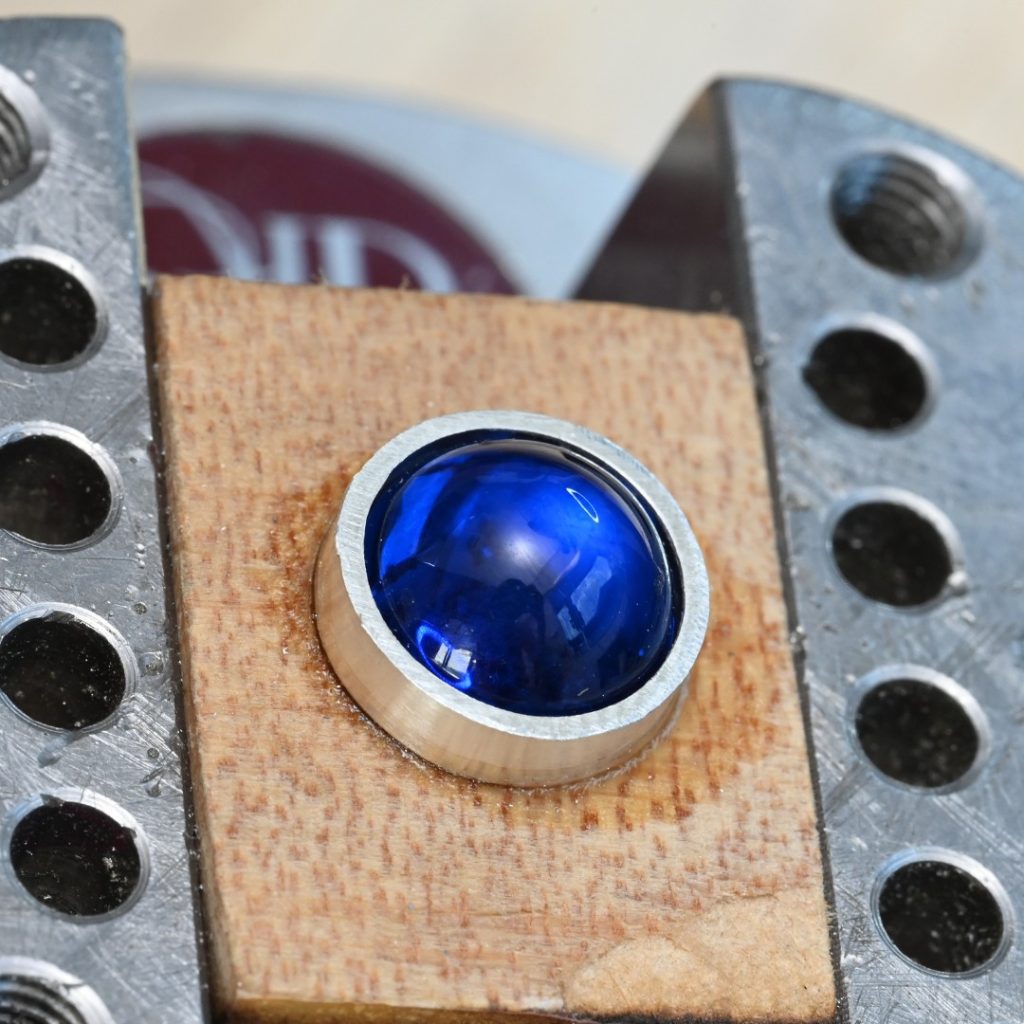

How to make a bezel setting when the stone height varies
This is often the case with stones other than rounds. Tear drops, triangle and pear-shaped cabochons (amongst others) often have different curvatures to the profile of the stones at the corners, and so this is where we need to pay extra attention in order to be able to set the stone securely and neatly.
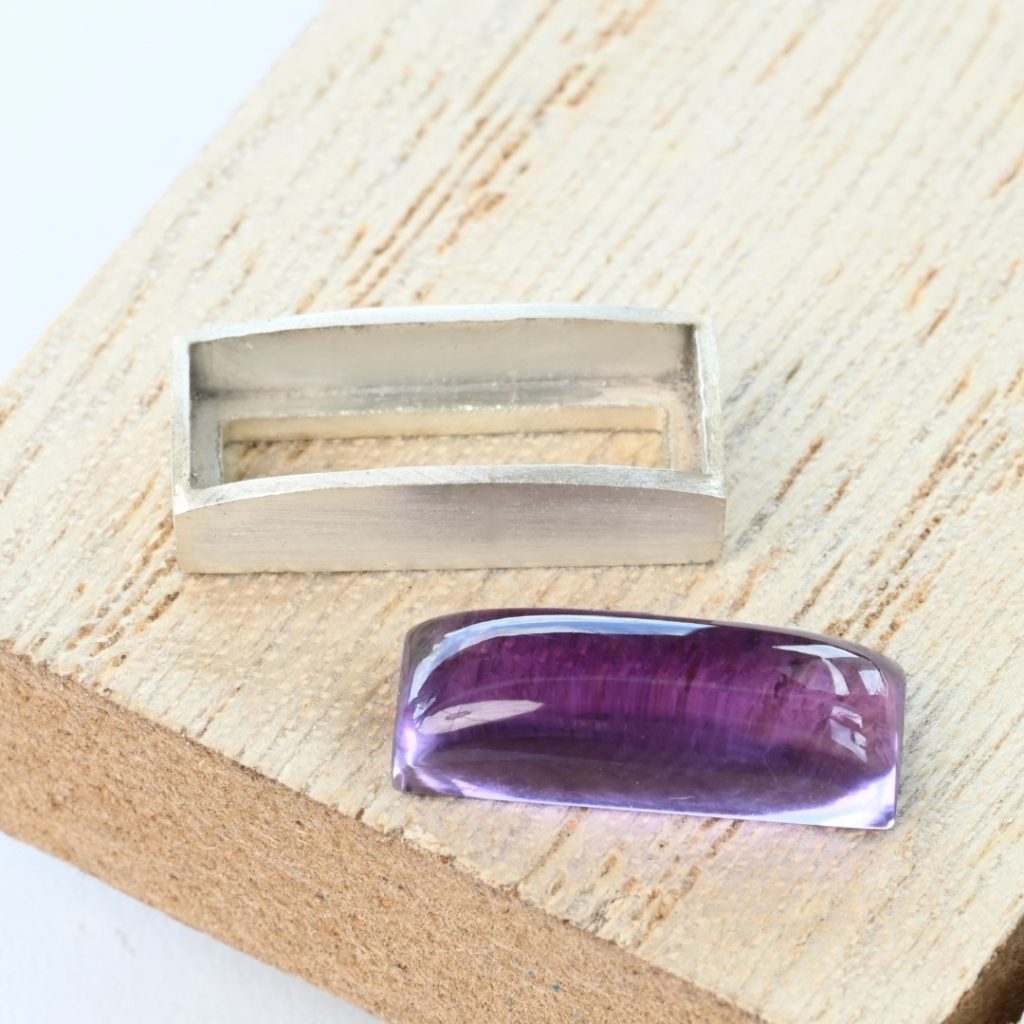

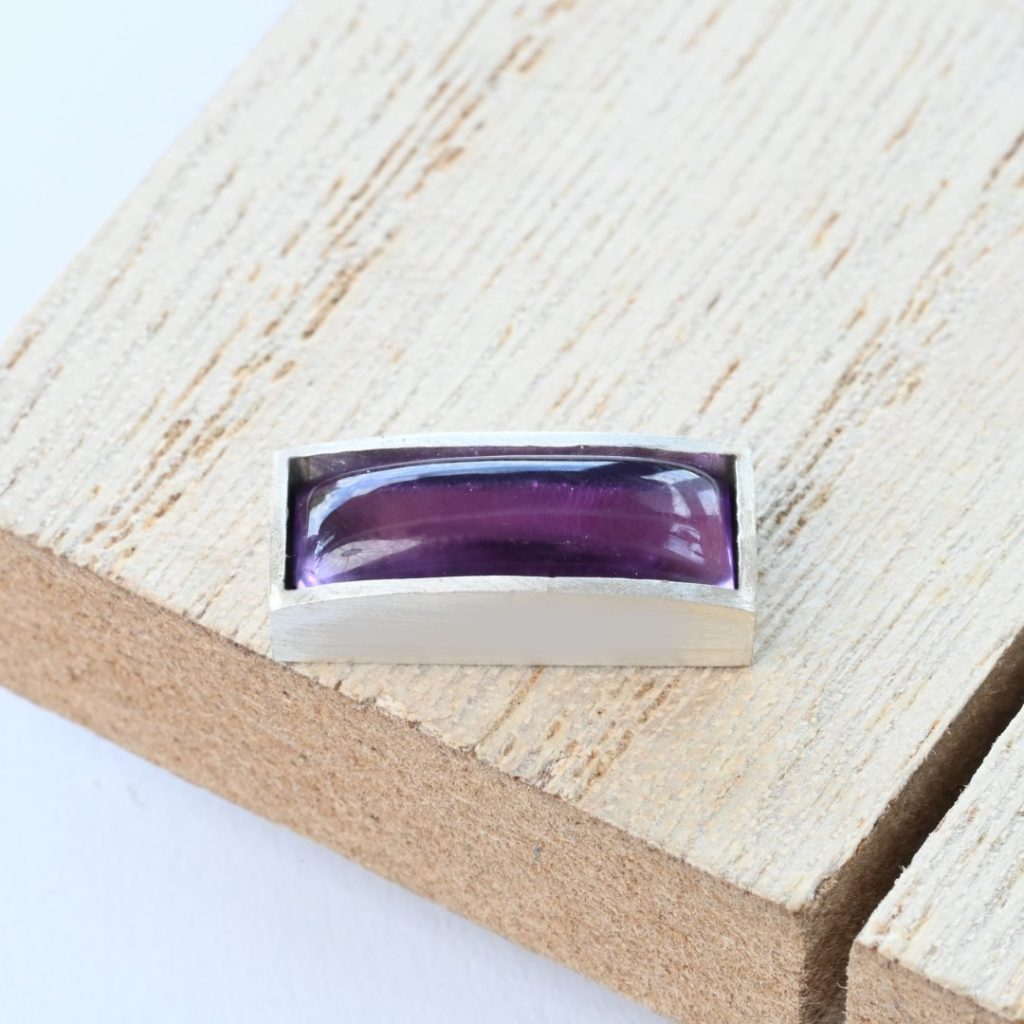

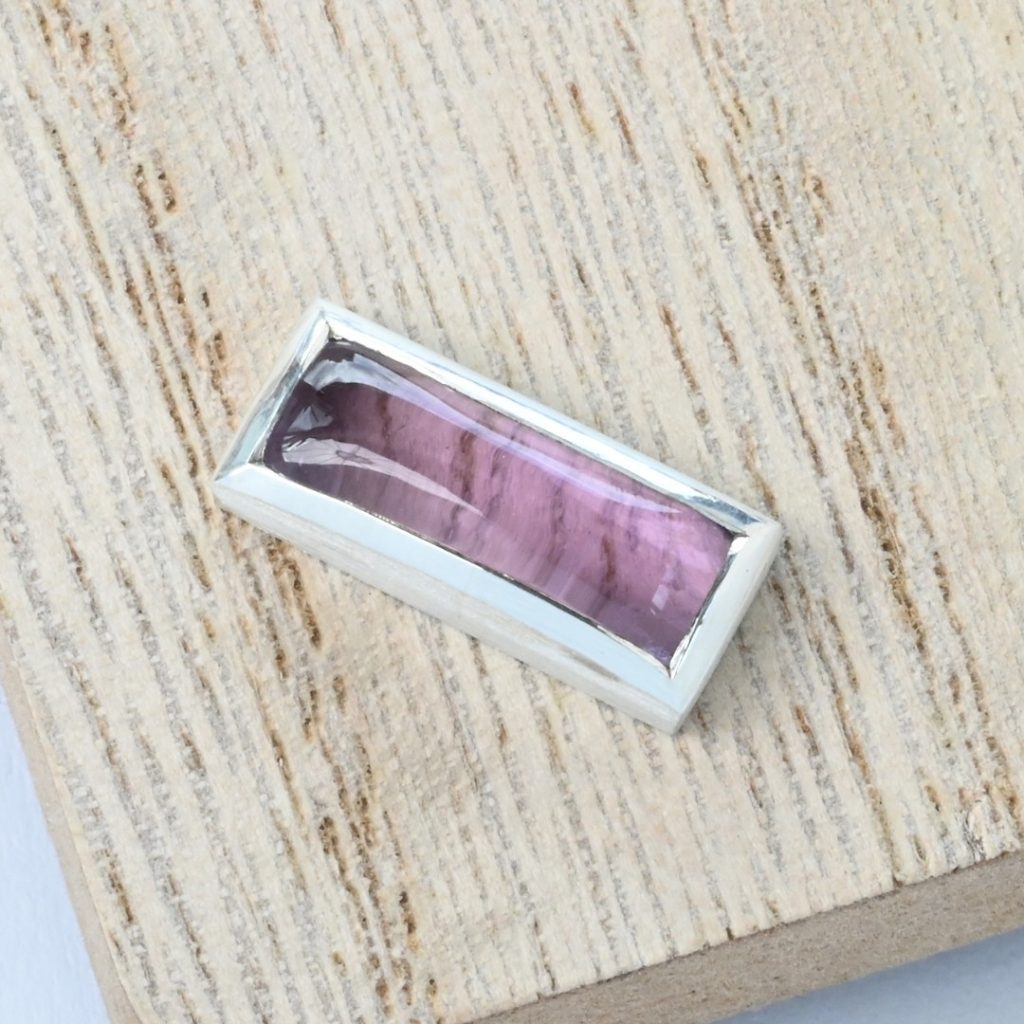

If the corners of a stone have a shallower curve to the rest of the stone...
The stone above is slightly lower at the narrower ends and is also considerably lower at each of the corners. The easiest way to deal with this is to adjust the height of the bezel very carefully at the narrow ends first and then the corners. It’s simply a case of lowering the bezel height where necessary to match the stone, but of course, we want to do this in a smooth and controlled manner. There isn’t a step in the bezel, but a gradual decline in bezel height as you get towards the corners. I find this easiest to do with a sandpaper roll for thinner bezels, but a file or sandpaper disks work great for thicker bezels.
Like the stones? Click here to grab yours now
How to deal with a bat shit crazy cabochon
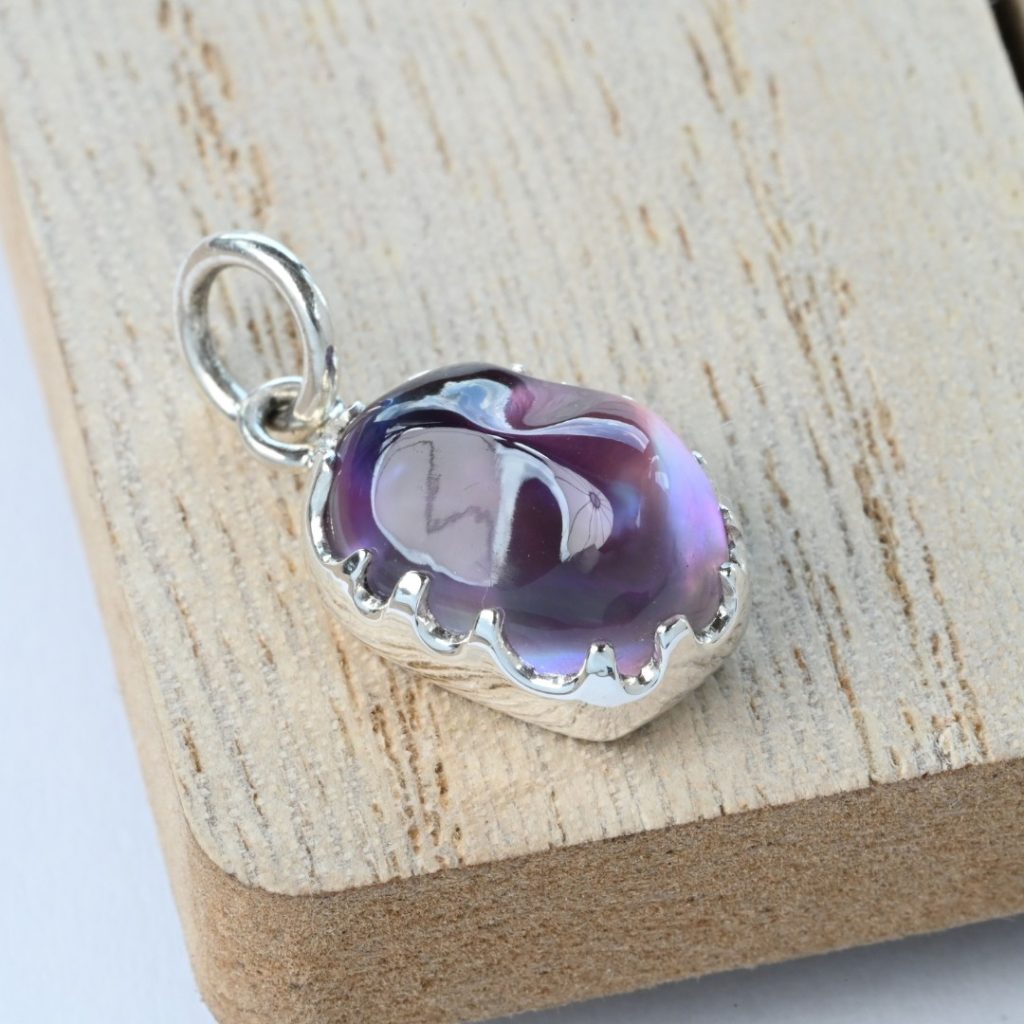
Of course, there are many ways to deal with this. But I thought you might enjoy seeing a fun cut-away example for a flat backed pebble shaped cabochon.
For this example, I simply cut down into a 22-gauge fine silver bezel using a cylinder bur to sculpt the random syrupy shapes. I also lowered some of them a little to add a bit more interest to the design. Then I simply set as I would a regular bezel.
Like the stone? Click here to grab yours now

A few more bezel setting examples
I will keep adding to this, but just to show you what the correct height looks like before and after setting:
Rectangular tourmaline cabochon
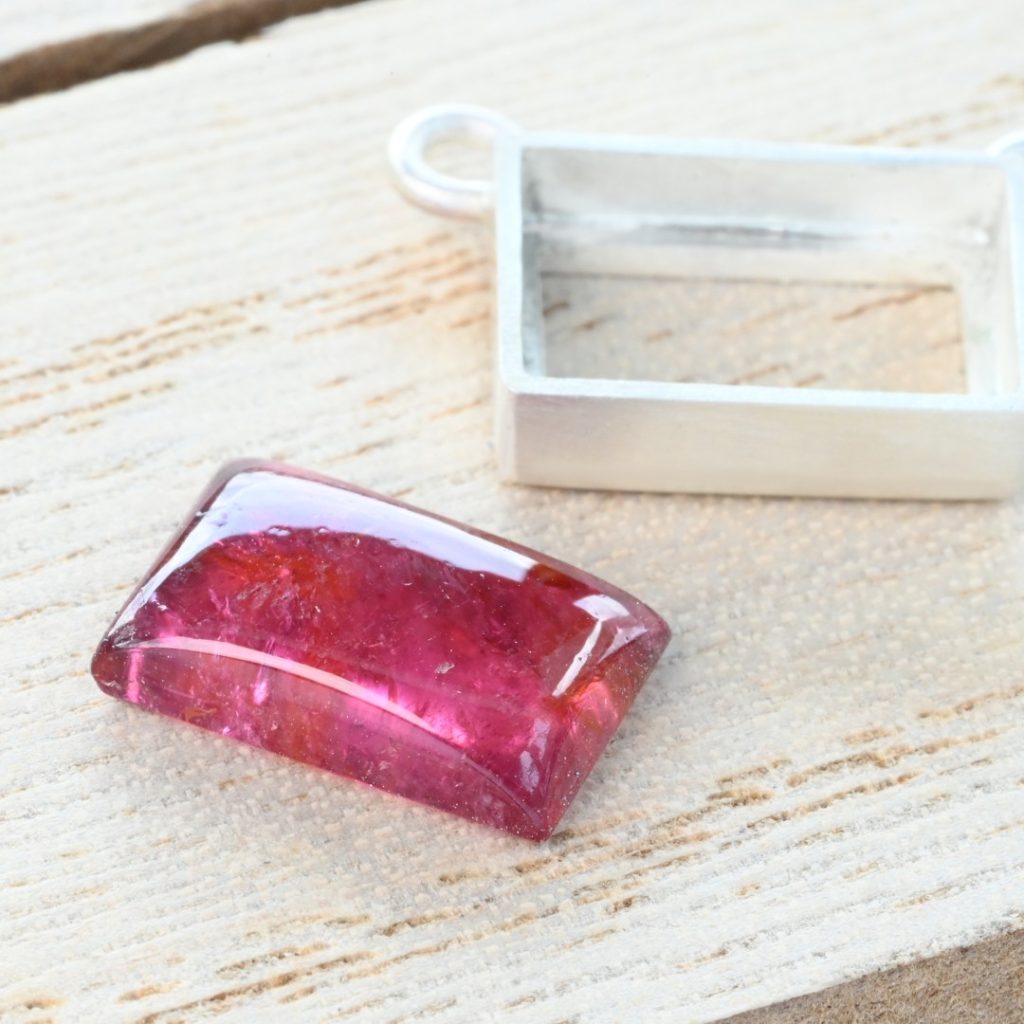

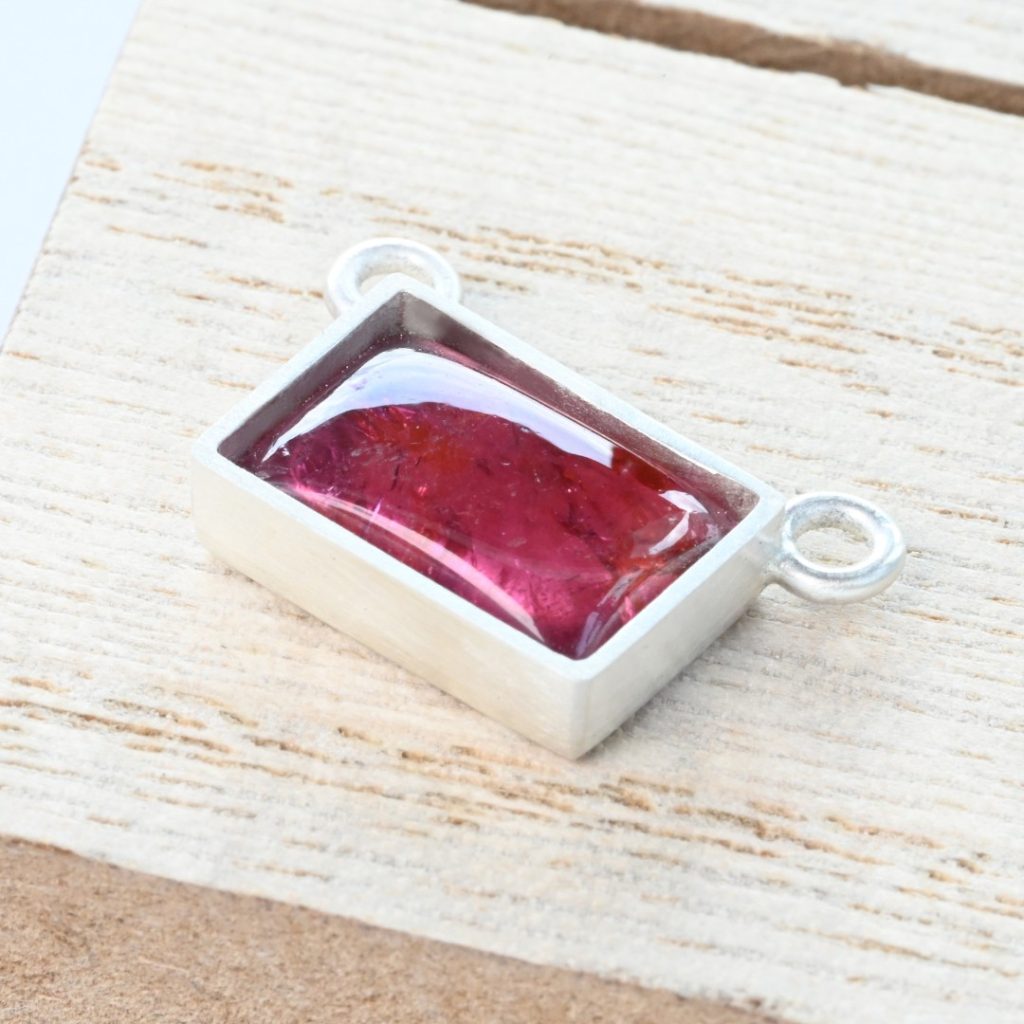

For this example, we have a rectangular pink tourmaline cabochon. If you look at the stone, you can clearly see that the profile curve at the corners is lower than at the sides. If we look at it sitting in the bezel – the corners have a lot more metal visible above the stone than at the sides too. And that is one key thing to look at, the inside of the bezel gives us a lot more clues whether we’re on the right track than the outside of the bezel.
If we try to set this as it is right now, we’re going to struggle. As the bezel stands above, the sides are too high and the corners are way too high. So, what are we going to do about it?
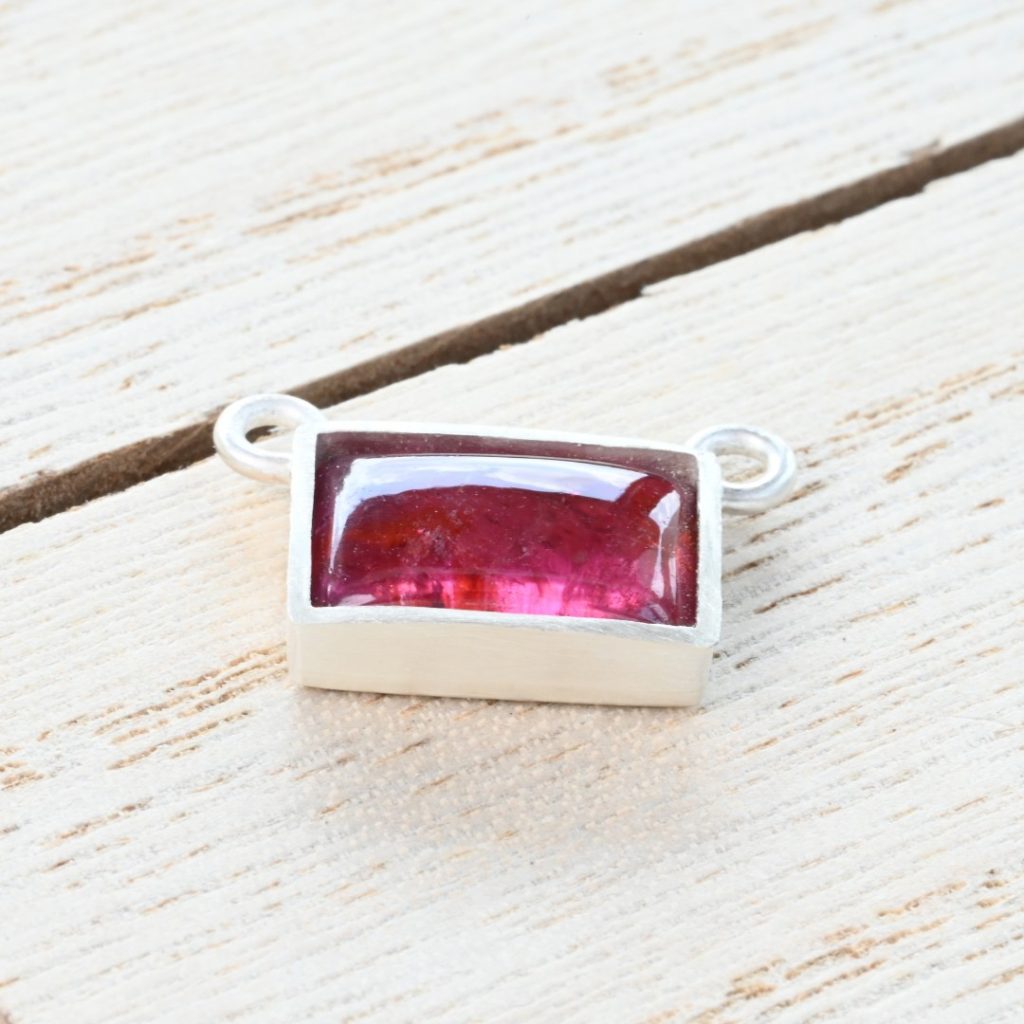

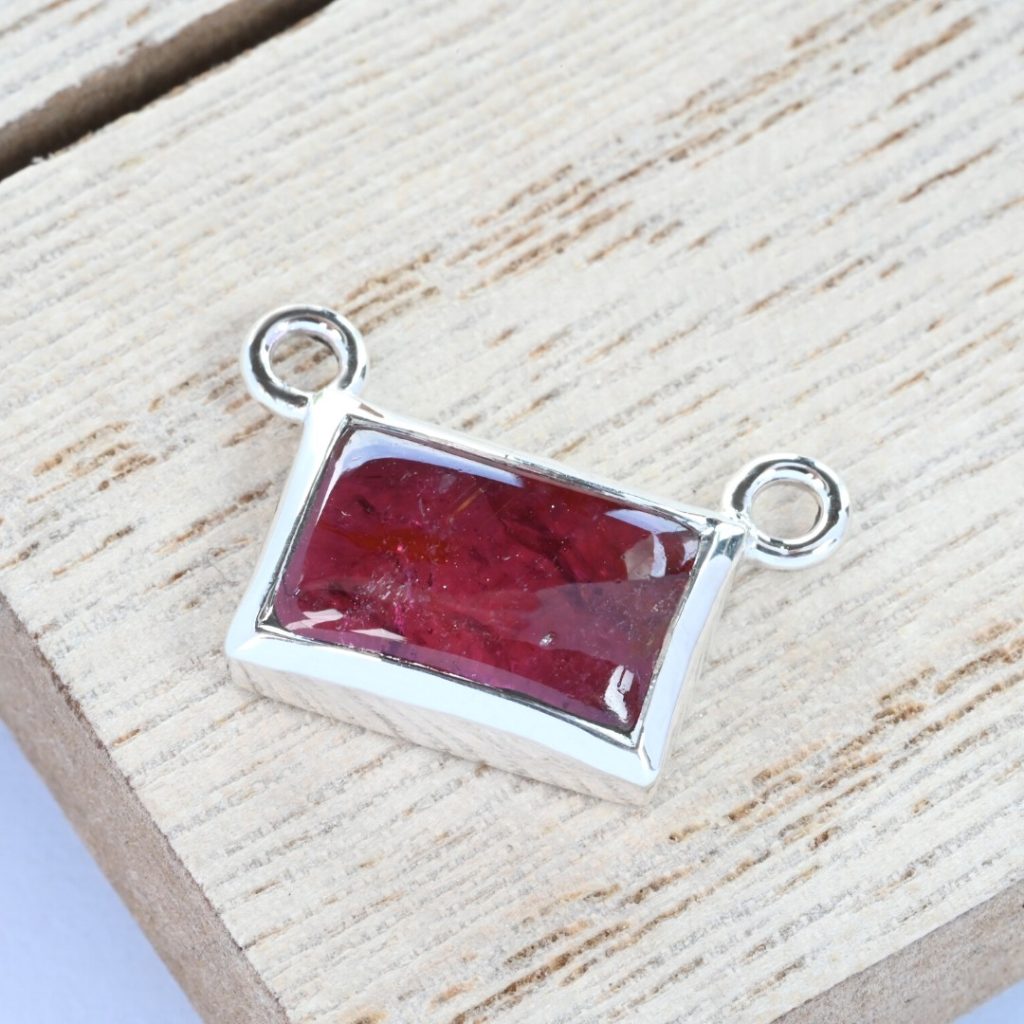

You can see from the image on the left that I lowered the bezel in general, and again took the corners down slightly to match the curvature of the stone a little more closely. I find wonky stones require a little more graver work at the end to get them looking as good as possible, so I tend to leave bezels for stones such as this a little on the higher side – especially when working in fine silver which is a bit more forgiving. If this were a perfectly cut stone, I would have taken the bezel down even further on the sides.
If you look at the side of the bezel after setting you can see, because of the tapering we did to the top of the bezel, there isn’t a perfectly flat delineation between the chamfer and the side of the bezel (it’s a gentle curve). I don’t mind that at all personally, it seems to be the price to be paid for setting stones with uneven corners – and it’s the neatest way I have found to deal with them.
Flat bottomed step cut tourmaline
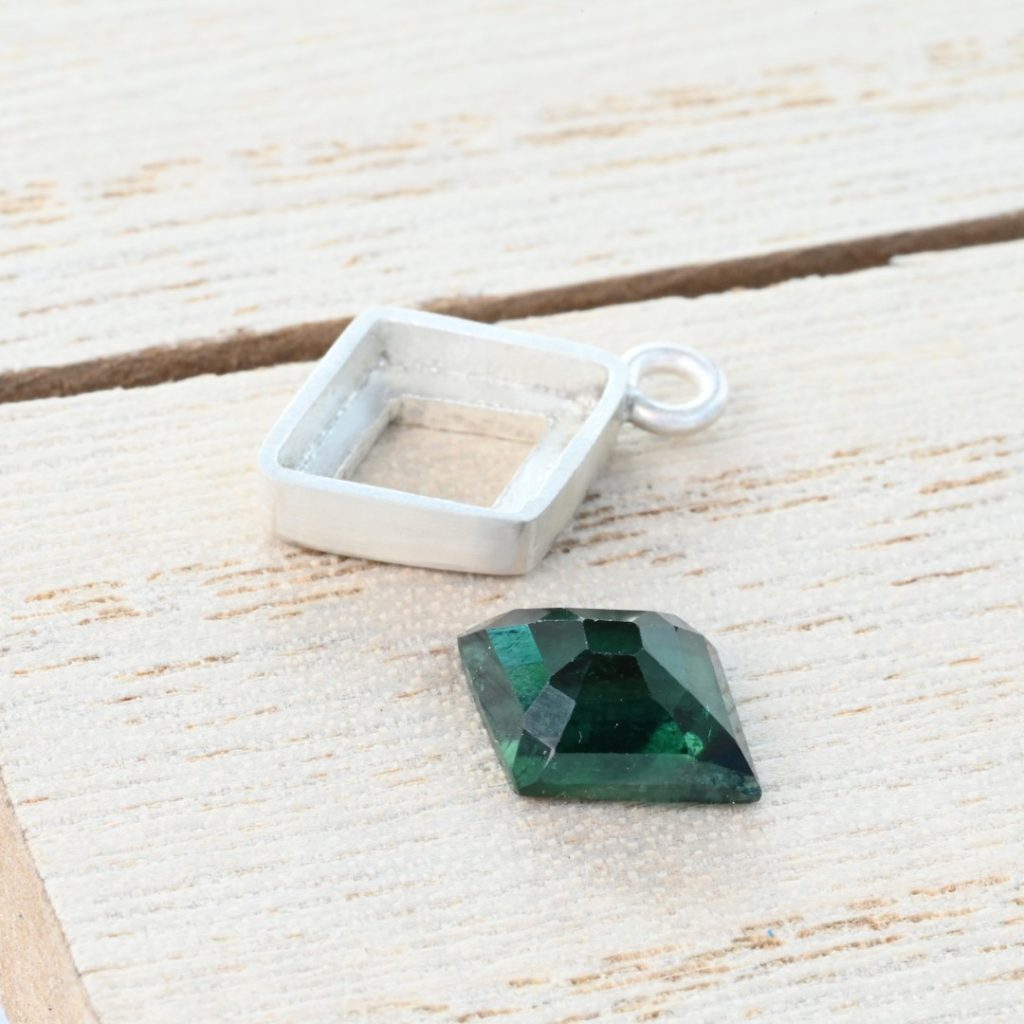

Wonky isn’t the word for this flat bottomed step cut tourmaline. Not only does the height vary around the stones, but the corner facets don’t perfectly meet the shape of the base.
If you’re just starting out with bezel setting, I don’t recommend tackling something like this to begin with. You’ll likely be able to get it set, but it’s hard to get bezels for this level of wonky looking half way decent.
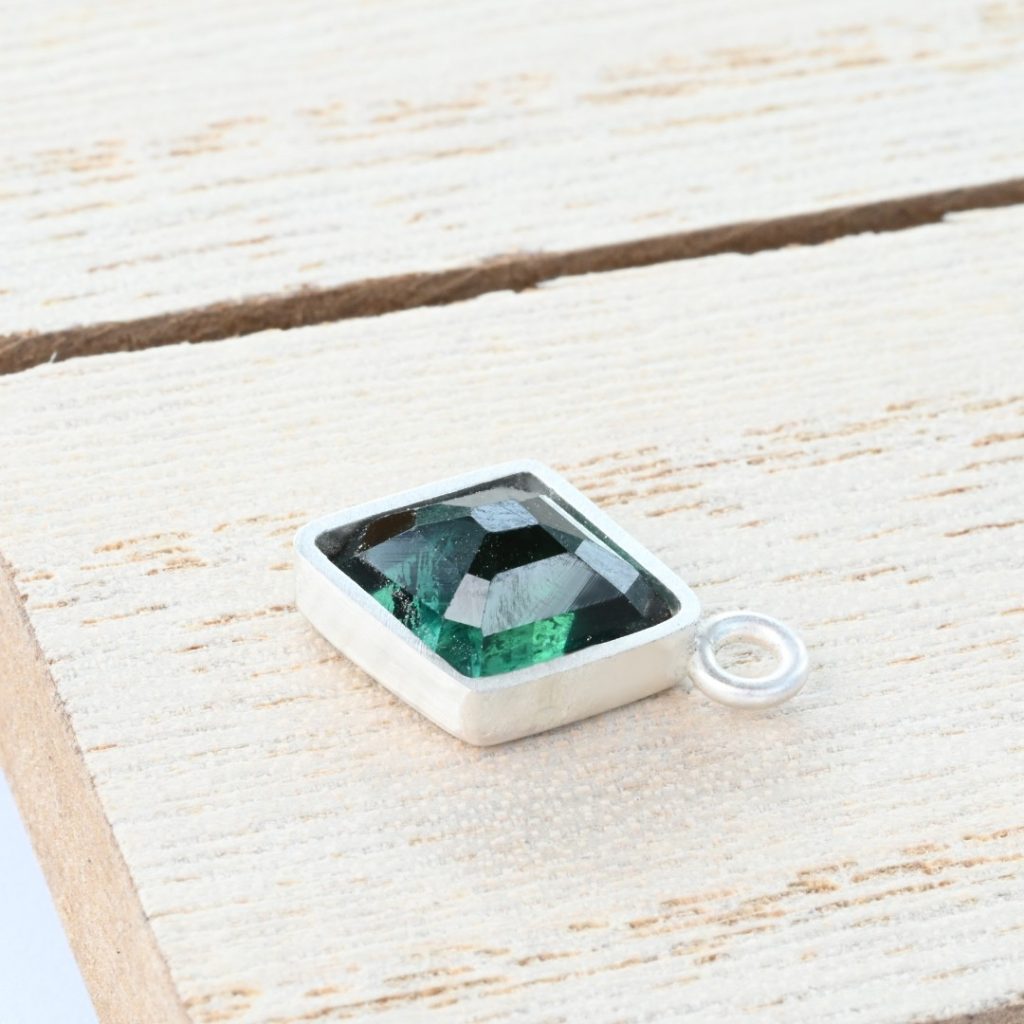

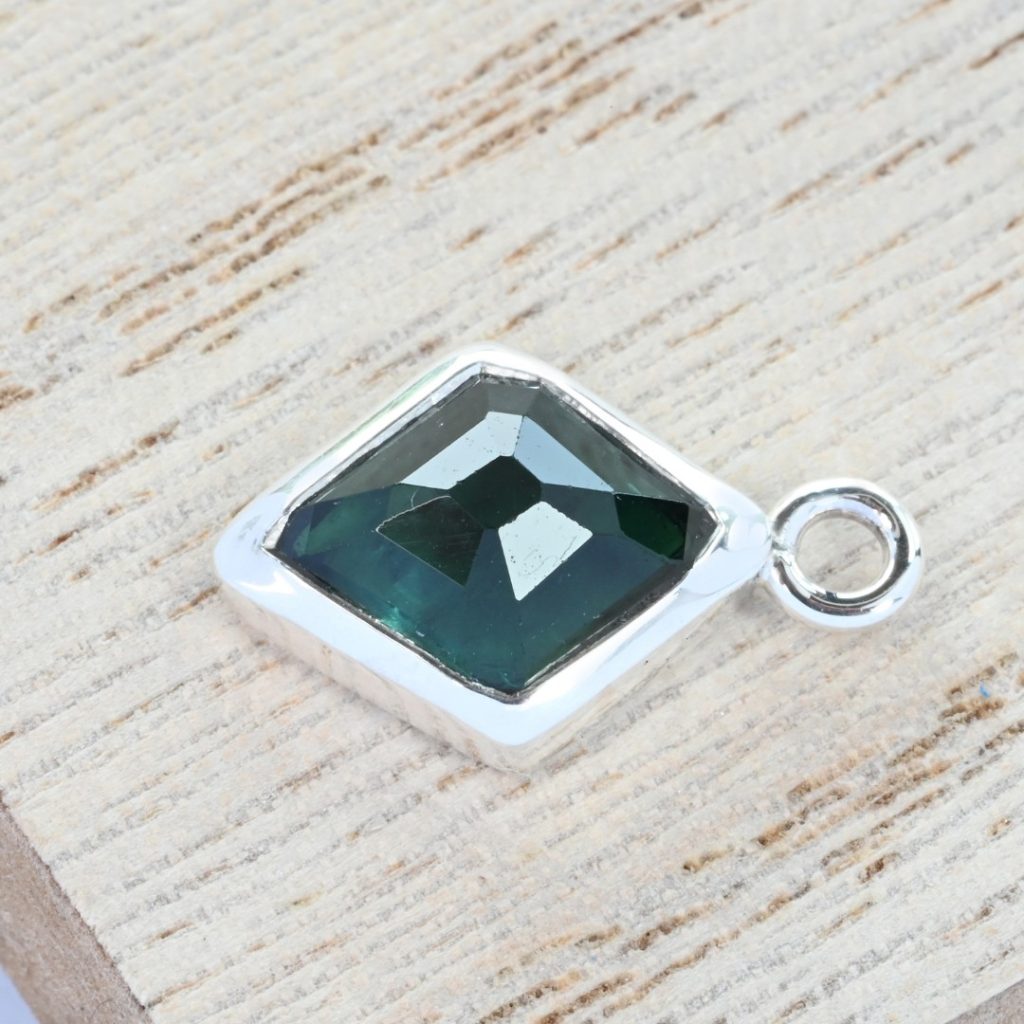

The main problem with this stone is that the base shape of the stone does not match the facets, so it was a tricky one to make a bezel for and I took the easy route again and used fine silver. Because the corners were clearly going to need a lot of graver work, I left them quite high – thankfully, the bezel was made from fine silver, so it was relatively easy to maneuver over the stone despite being quite high at the corners. Honestly, if I had to bezel set this again, I might give it a textured finish just to embrace the imperfections of the stone – in fact, I might still do that. Alternatively, a stone like this might be easier to prong set. Having said all that, I do love the slightly organic look of imperfect stones in a bezel – even if they are utter assholes to set.
Druze Cabochon
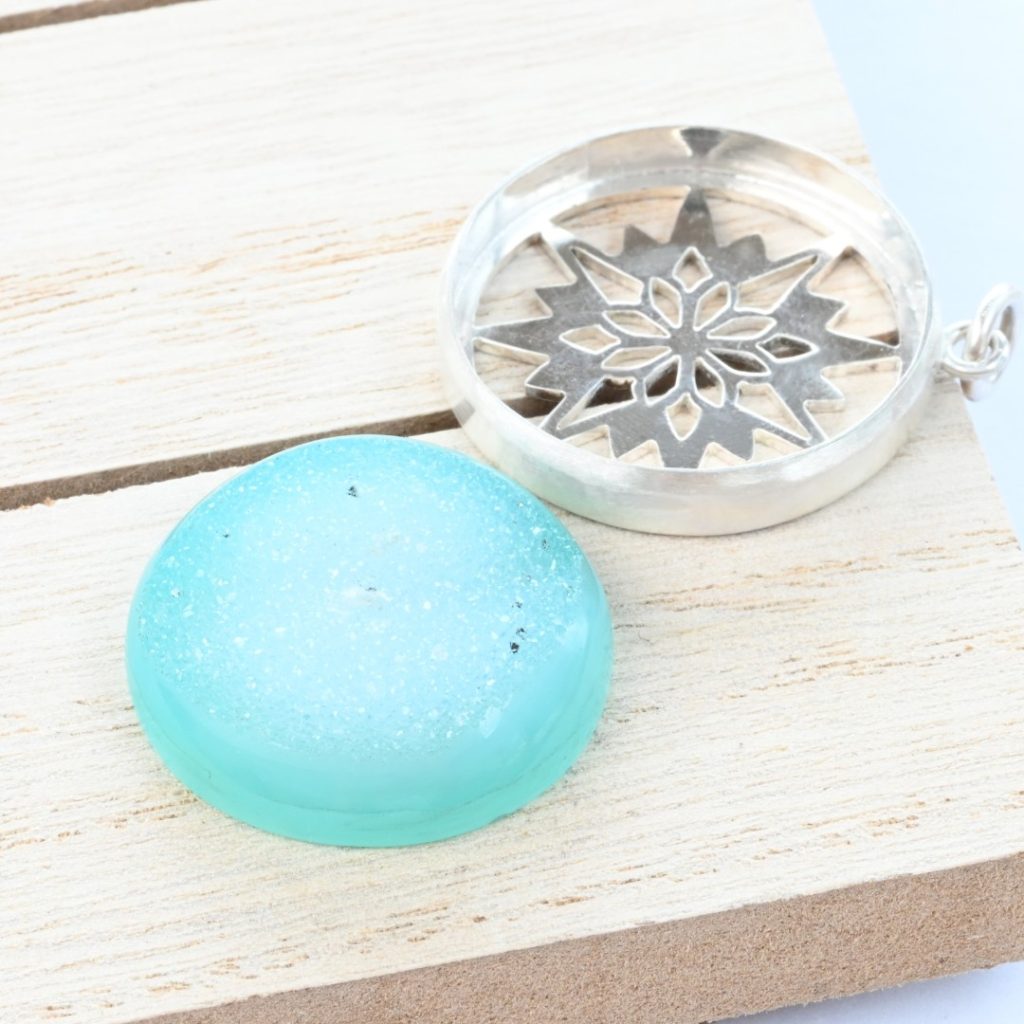

Ahhhh, a druze cabochon with beautiful, even sides. I’ll be honest, for a style like this, I wouldn’t pick a stone for bezel setting where the druze portion of the cabochon would sit below the bezel. You get a much better finish for a smooth bezel if you aren’t setting on the druze portion of the stone. With heavy bezel setting, it is also exceptionally easy to break portions of the druze off too.
For this, I made a sterling silver bezel with a pierced out back plate – just to add a little extra detail.
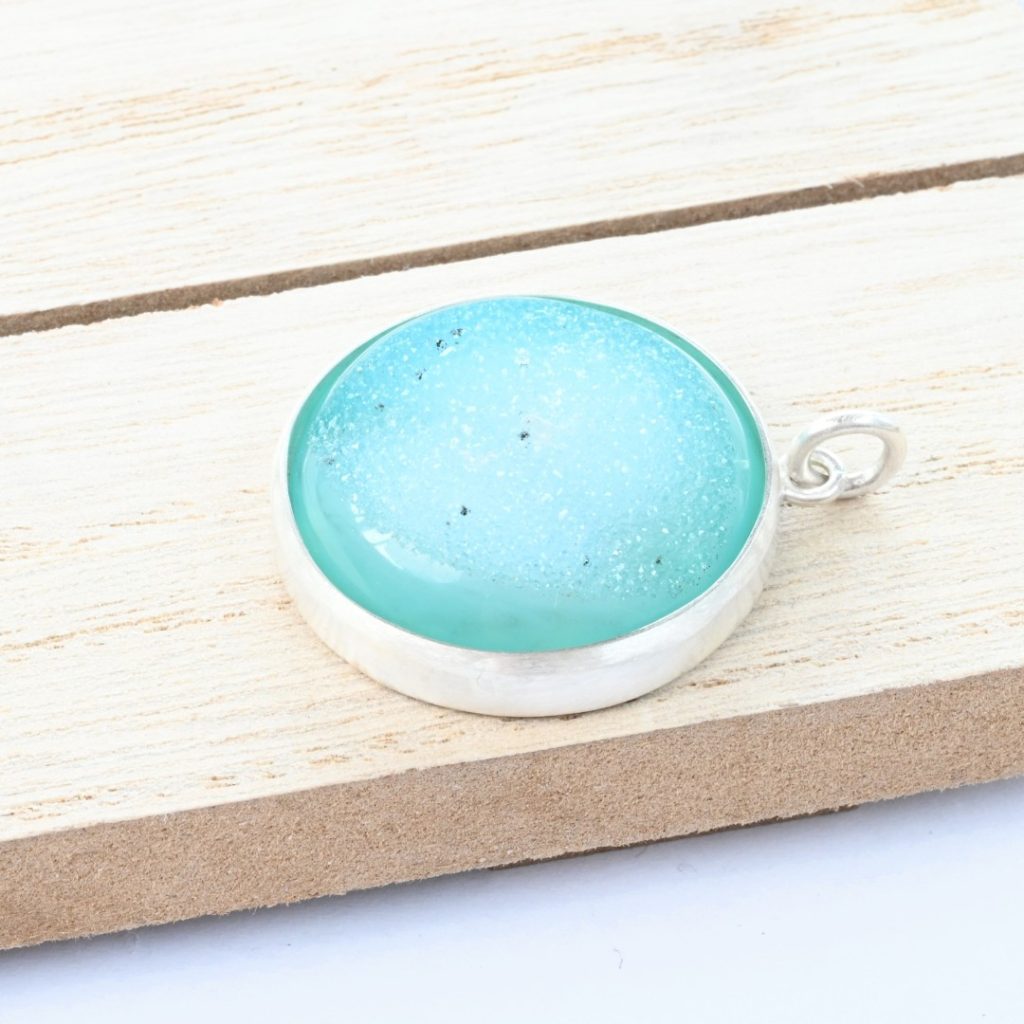

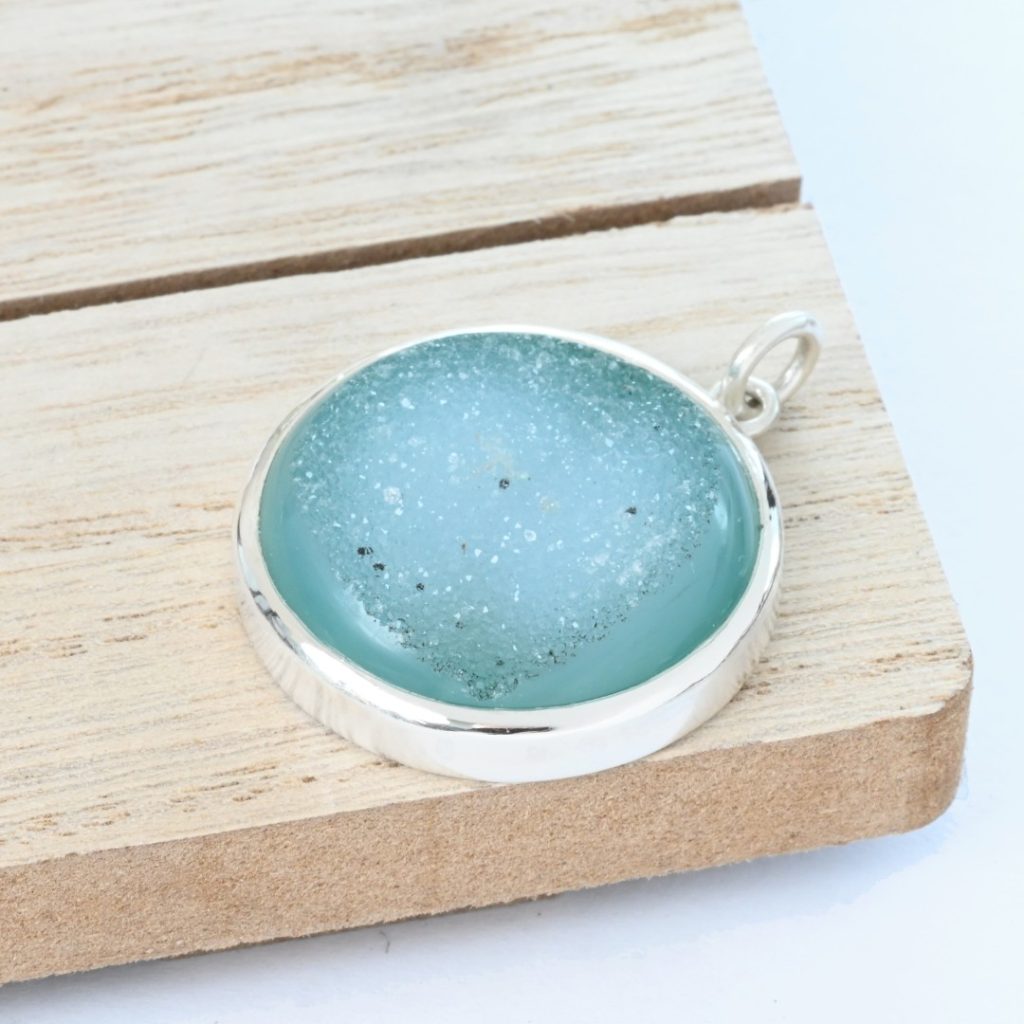

This bezel is 20-gauge sterling silver, which means it is going to be difficult to move down and over the stone. For this reason, even more so than with fine silver, it’s imperative to ensure the bezel is not too high, and that we have a decent chamfer on the outside. As you can see, this one worked out pretty well in the end – please excuse the polishing compound on the stone – I only saw that bit after taking the pictures (and I was feeling too lazy to retake the piccies).
Bezels, it's 80% about getting the fit and the height bang on.
I know we didn’t really go into details on the fit, but that part is simple, the stone should fit in the bezel like a glove. Of course, it should never have to be forced in, as this is a breakage risk for the stone. But it should also not have any gaps between the inside edge of the bezel and the stone.
But believe me when I say this: if you take the time to get your bezel the right height and the perfect fit, you really are 80% of the way there to having a beautiful bezel setting.
Ready to dive in and create your own professional looking bezel settings?
