
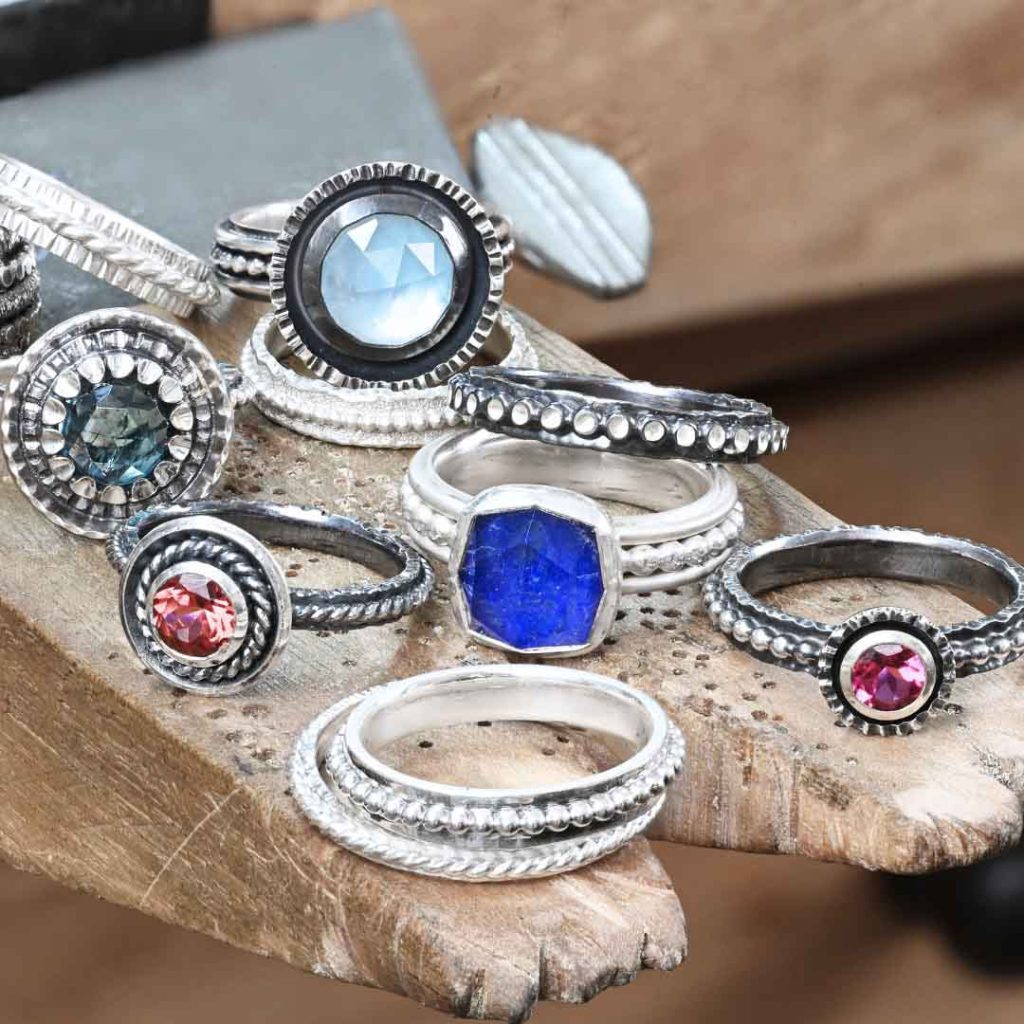
RINGS WITHIN RINGS
Have you ever made something truly spectacular, but really struggled with getting that perfect finish? If so, we’ve got you covered every step of the way.
Crafted over 5 months, this exceptional class offers over 4 hours of high-definition video footage and crystal-clear explanations. And the icing on the cake, we’ve written you a full colour handout with close to 150 pages of step-by-step instructions (it’s actually larger than your average jewellery making book).
Let's Do This!!
Access valid for 1 year upon payment.
The 100+ page full colour handout is yours to download and keep forever!
Please note, this is not a beginner level class, you’ll need to have reasonable soldering, fabrication and bur control skills to make the most of this one. Bezel setting experience is also advised.
Join the Metalsmith Academy for access
to all our online classes
Not only will you have access to our Rings within Rings class, but you’ll also be able to learn from hundreds of videos we have available over at the Metalsmith Academy. Plus, Lucy and Vennice, together with our incredibly supportive online family will be available to answer your questions over in our community forums every single day.
A stunning project that's really going to help improve your soldering skills!
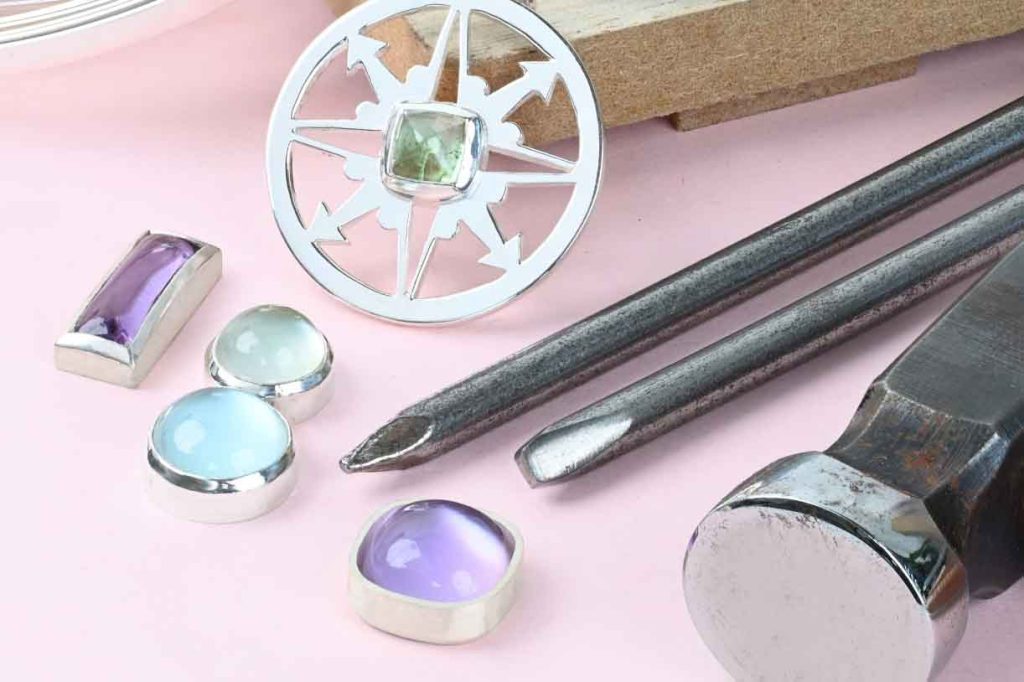
Want to know what tools you'll need for this class?
Remember - you don't need all the tools in this list, we love to show more than one way to do everything!
Ready to dive in?
Let's do this!!
We hear questions....
Don't worry, we hear them - and have answers for them all in this class
What order should I be soldering in?
This is one of the reasons we made this class. We wanted to share with you how creating complex designs in “sets” and then soldering these individual components together, really is the way to go when working with more designs containing lots of solder joins.

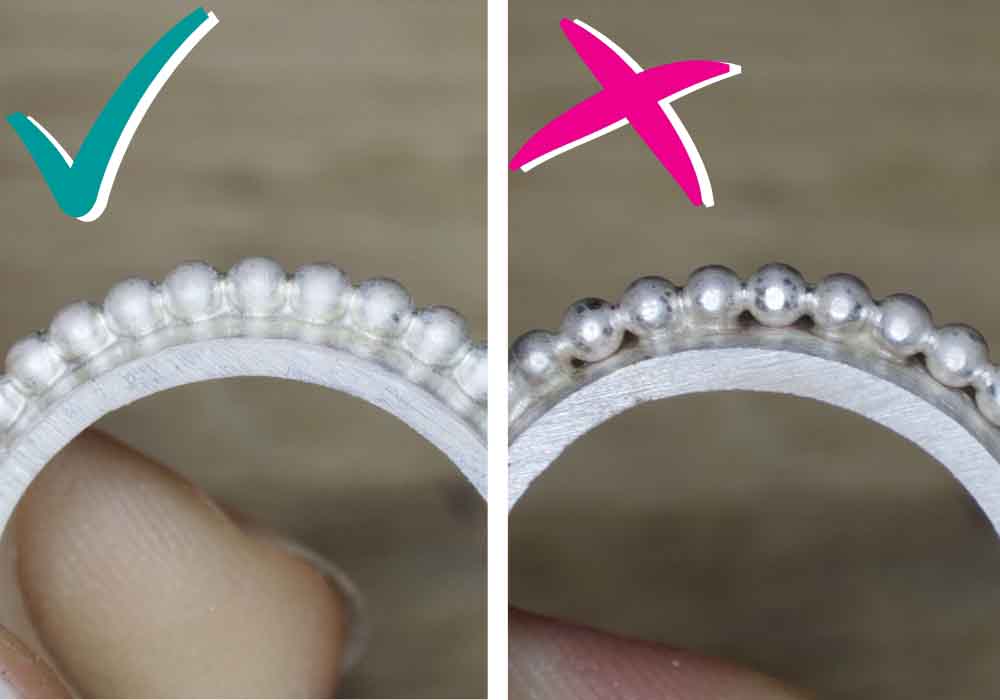
How do I clean up excess solder?
Oh, we went crazy with clean up in this class, we even went as far as to making a few naughty ring bands just to demo how to deal with solder that didn’t flow quite as planned. Get those rubber wheels at the ready, and go easy on the coffee, this needs some serious control.
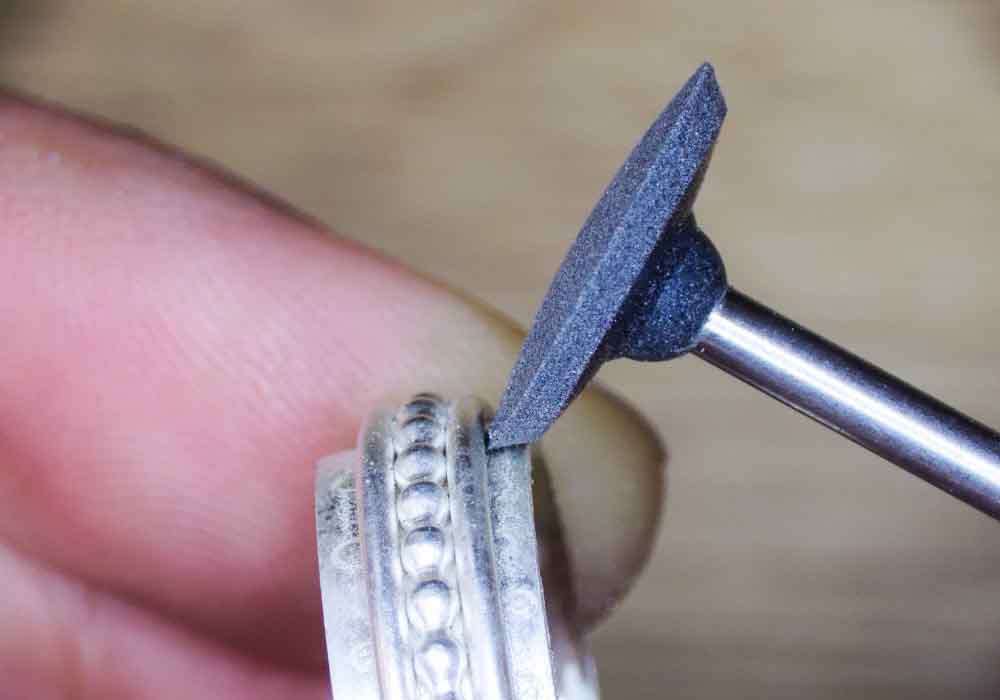
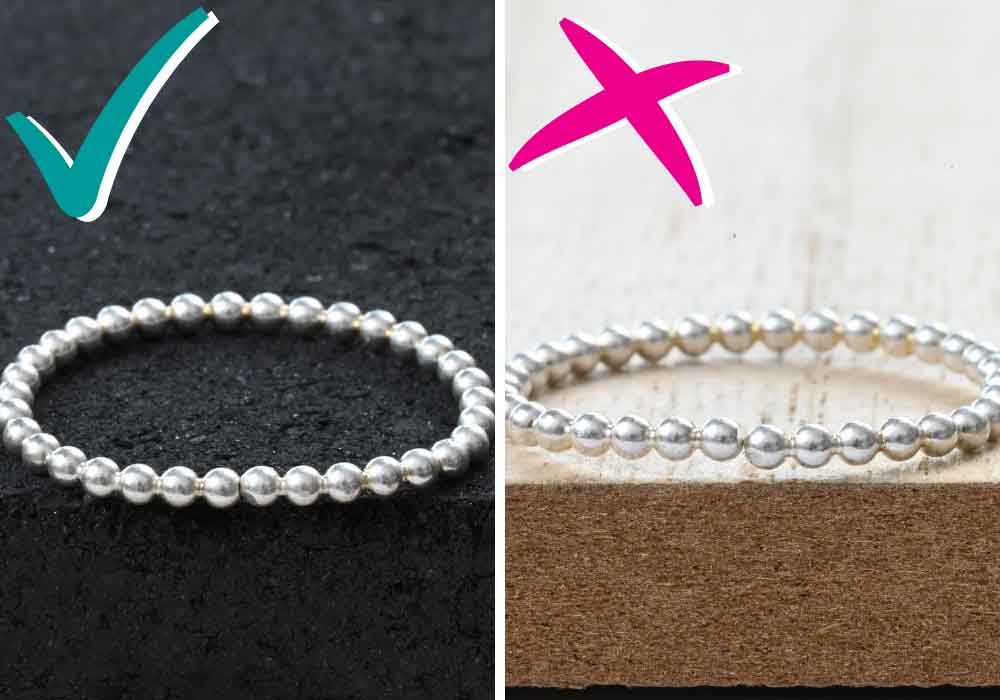
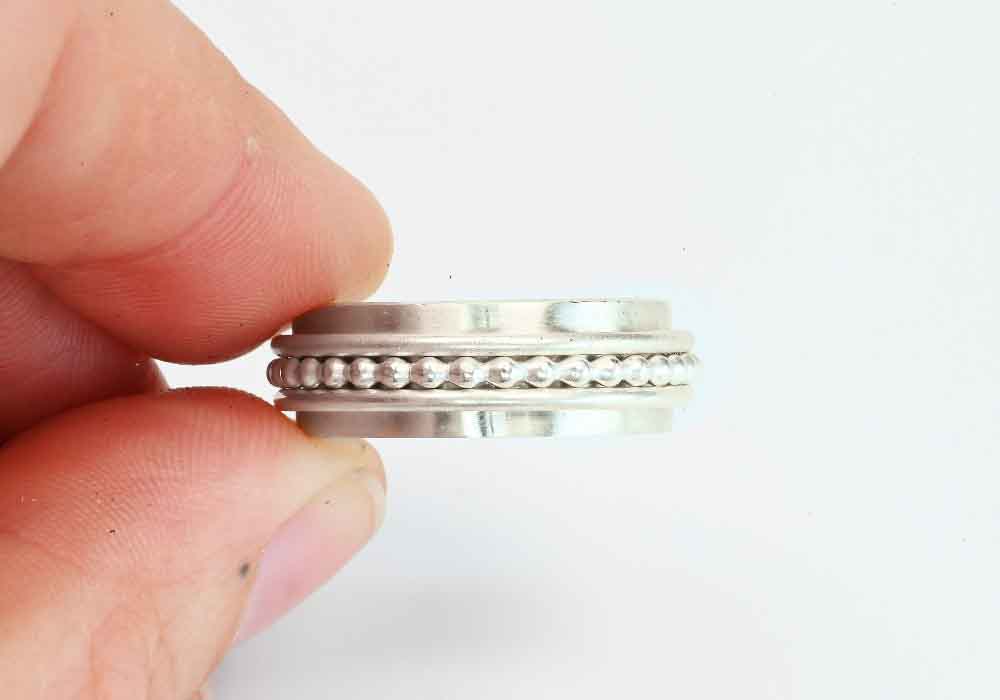
How do you solder beaded wire to a plain ring band without gaps?
It’s a little pet peeve of mine I’ll be honest. Using ready-made wires to create boarders or soldered elements is a great way to add detail fast, but that doesn’t mean it’s just solder and go. In this class, we’ll show you how to do it in a professional-looking way!
What's the simplest way to form a ring band?
With cheap as chips half round and flat pliers! Often it’s really not all about having the fancy tools, it’s about knowing how to use the ones you have effectively.
How to get a perfect solder seam on a ring band?
It’s no big secret, most of what’s involved in getting a perfect solder join, happens before we even light the torch – preparation is key! Of course, there’s more than one way to do this, and in this class, we’ve lined up the options for you!
How do you polish and finish rings to a professional looking standard?
By working mindfully throughout the entire process, keeping tool marks to a minimum, and cleaning up our work as we go along. Finishing is never the final step. It’s woven throughout the entire process of making a piece of jewellery.
How do you fix solder joins that aren't quite perfect?
Well, my aim is to make sure you don’t end up with those in the first place. But we have this class full of tips and tricks relating to fixing soldering mishaps!
How do you solder rings together seamlessly?
By getting the perfect fit to begin with, of course. Don’t worry, we’ve got you covered with that in this class.
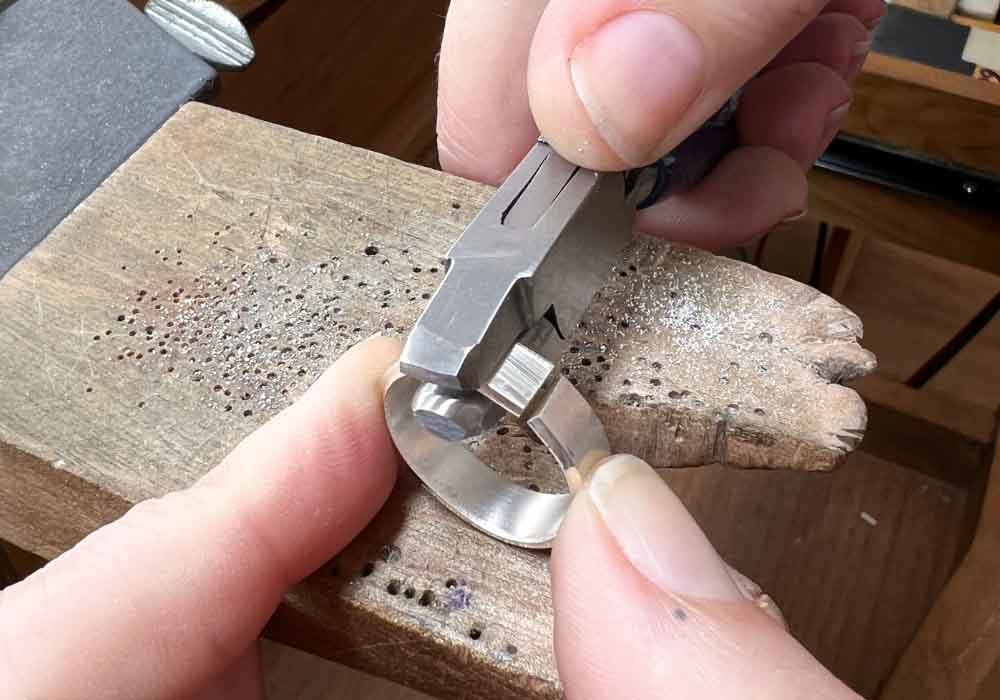
How do I solder my setting to the ring band for a perfect finish?
Again, it’s all about that perfect fit. Soldering is easy, it’s the setting up for soldering that takes a little effort.

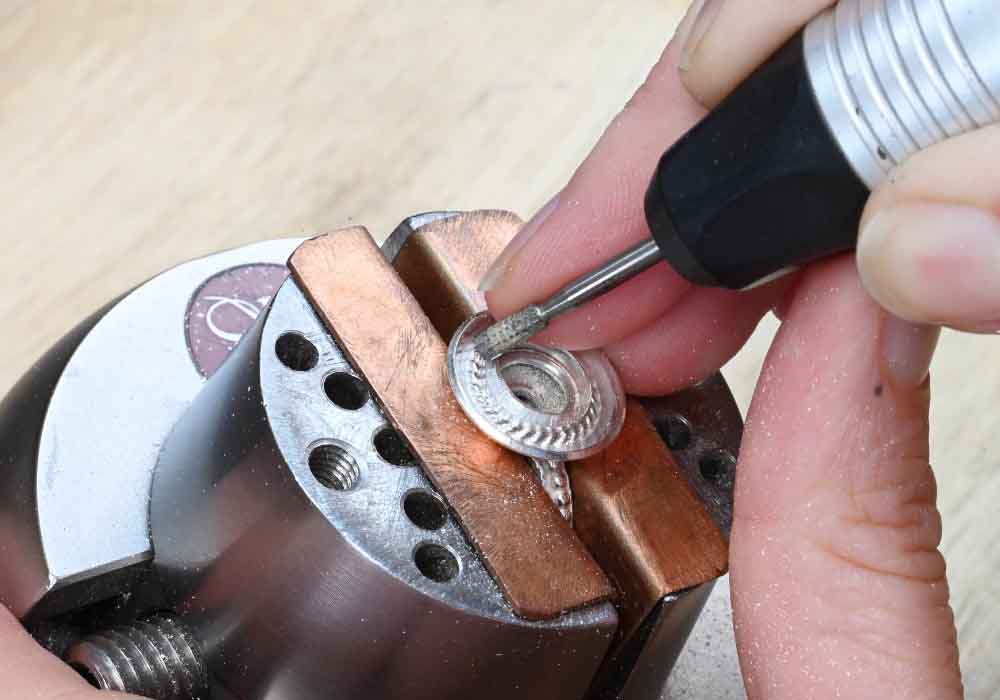
How can I cut a chamfer for my bezel when I can't reach with a file?
With a bur, of course. I hope you’ve been practicing those bur control skills, but this is super easy I promise!
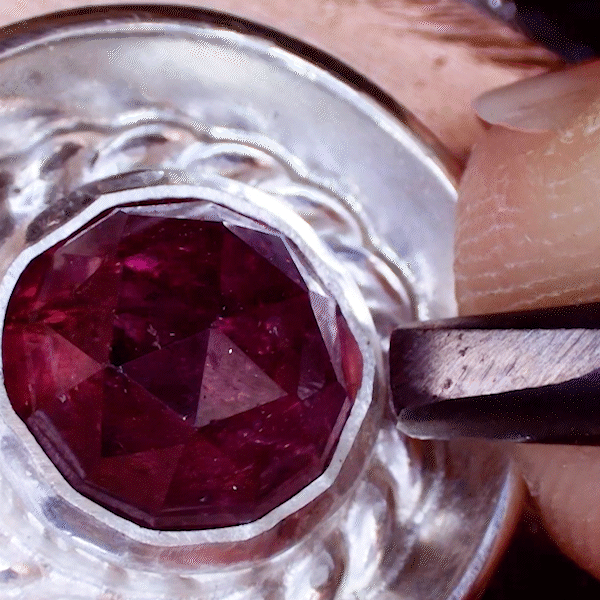
How do I bezel set a rose cut stone - and of course, how do I make the bezel in the first place?
We’ve got you covered there. We’re even going to take a look at how to make a seat inside the bezel using an inner bezel.

Other things we cover in this class
Multiple ways to solder a ring band
How to use a guillotine shear
How to use a ring stretcher to round out a ring band
Adding textures using the Foredom hammer handpiece
Bezel setting a round rose cut gemstone using an inner bezel to seat the stone
Finishing bezels like a pro!
Getting creative with hammer textures on ring bands
Soldering an open back setting onto a ring band in a professional manner
Creating a twisted wire border around a bezel setting - without any unsightly gaps
And so much more.....
Skills you’ll need for this class: You’ll need to be confident and proficient with basic level sawing, filing and soldering skills.
We cover bezel setting for round rose cut stones in this class, using a Foredom hammer handpiece. If you want to learn more about bezel setting, please check out our Bezel Set Pendant class, and for instructions on bezel setting with a hammer and punch our Chunky Bezel Set Ring class has all the answers.
Why join the Metalsmith Academy?
We want to make sure you get it!
If you can SEE and understand the action, you're halfway there!
Whether you’re talking about clear concise explanations, learning in a logical order or close-up videography where we never accidentally go off camera – we’ve got you covered!
Disclaimer: we do sometimes go off camera – but that footage never makes the cut. That is how much we care about making sure YOU GET IT!
But you know, it’s not just about classes, there’s so much more waiting for you over at the Metalsmith Academy to help you become a confident, ass kicking jeweller……
Prefer just to purchase the one class?
If you’d prefer not to have the commitment of a membership, you can just to purchase this as a stand alone class. The class is valid for a 1 year period, and the handout is yours to download and keep forever
Course overview
Video 1: Introduction
Covering what you’re going to need as well as what we’re going to be focusing on this class.
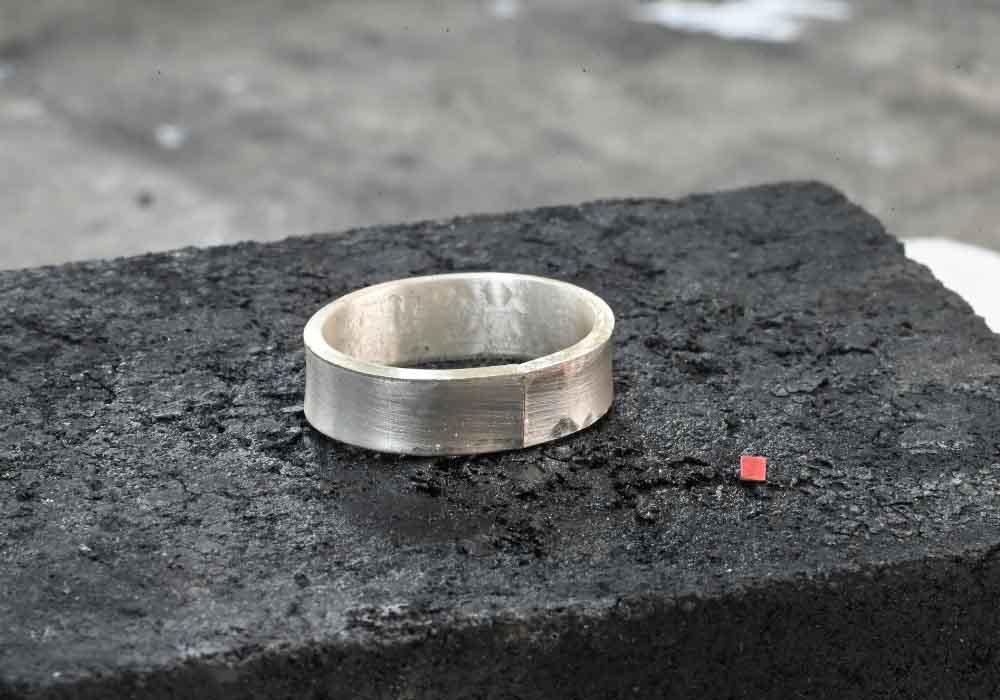
Video 2: Forming a simple ring band
How to form a simple ring band from 16 gauge sheet, including how to use a guillotine shear and how to get that perfect solder join.
Video 3: Three ways to solder a ring band
There’s always more than one way to do everything, it’s just about finding the way that works best for you. In this video, I’ll share my three favorite ways to solder a ring band for minimal clean up.
Video 4: Rounding out and cleaning up the ring bands
This is where we’ll start first taking a look at the finishing process, as well as learning how to use a ring stretcher to round out ring bands (we’ll be covering the traditional way too of course).
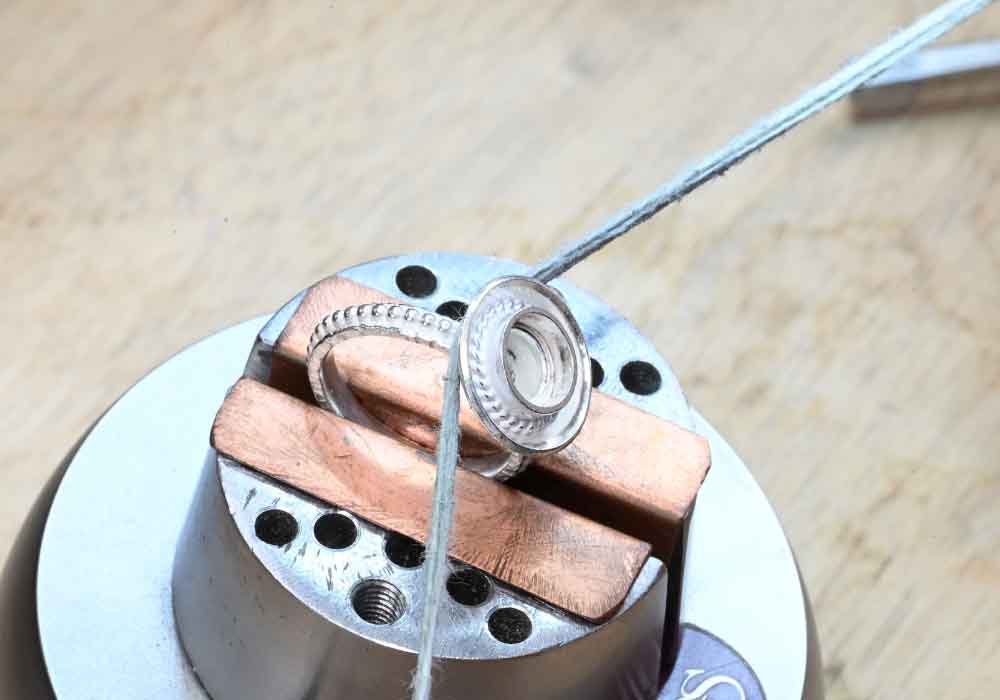
Video 5: Making the outer ring band
We’ll take a look at forming our outer ring band here from round beaded wire, including how to get an invisible solder join followed by soldering this to our inner ring band. Of course we’ll be diving into getting the perfect finish here too.
Video 6: Adding texture to the ring band
I always like to share how to get things bright and shiny. But honestly, I much prefer unique textures. In this video, we’re going to dive into exactly that.
Video 7: Making the Setting
This one’s a biggie! Here, we’re going to take a look at making a bezel setting, creating an inner bezel for our stone to sit on, and adding a border to our bezel. After all that, we’re going to solder everything into a domed form to create a unique looking bezel setting!
Video 8: Soldering the setting to the ring band
This is all about preparation! We’ll dive into how to create the perfect fit between your setting and your ring band, before soldering everything together. We’ll also take a look at how to deal with pesky solder spillages.
Video 9: Setting the stone
Finally, we’ll get to setting the stone using a Foredom hammer handpiece. Don’t worry if you don’t have one of these though, we’ll also be linking to a video on how to make a setting punch from a nail (and using it, of course). Please be aware however, this is not a beginner bezel setting class.
Extra Resources
You know we like to make sure you have everything you need to succeed!
Making a setting punch from a nail + bezel setting tips and tricks
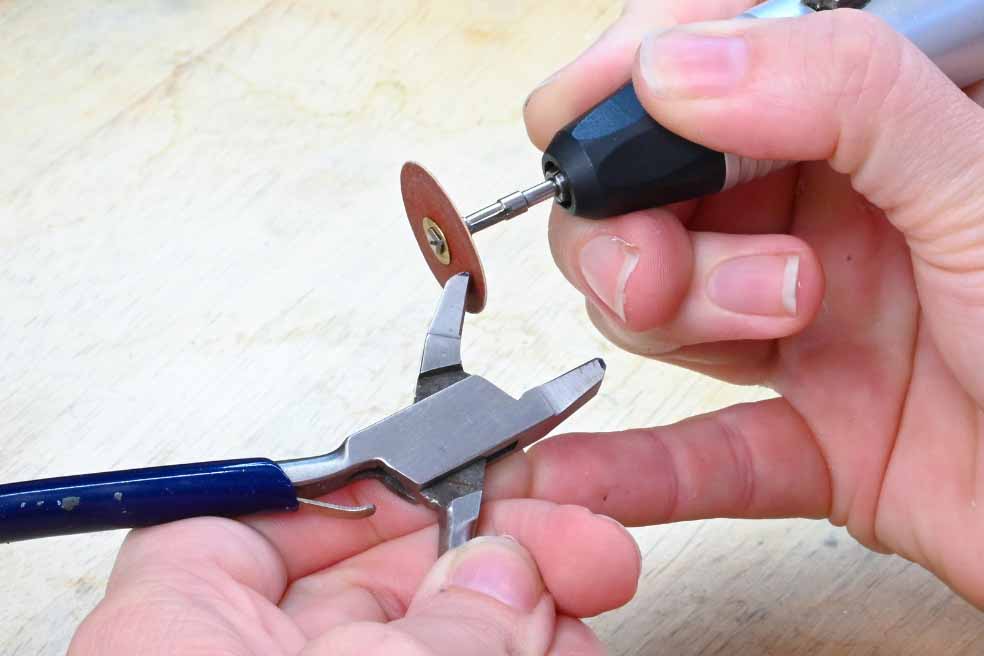
Modifying cheap as chips pliers for extra grip strength
Preparing your solder
Modifying hammer handpiece anvils for minimum clean up
How to use a solder pick
How to clean up excess solder from beaded wire
Making sandpaper sticks and cushioned sandpaper sticks
Making your own sanding rolls
When it comes to online jewellery making classes, we know you need the details
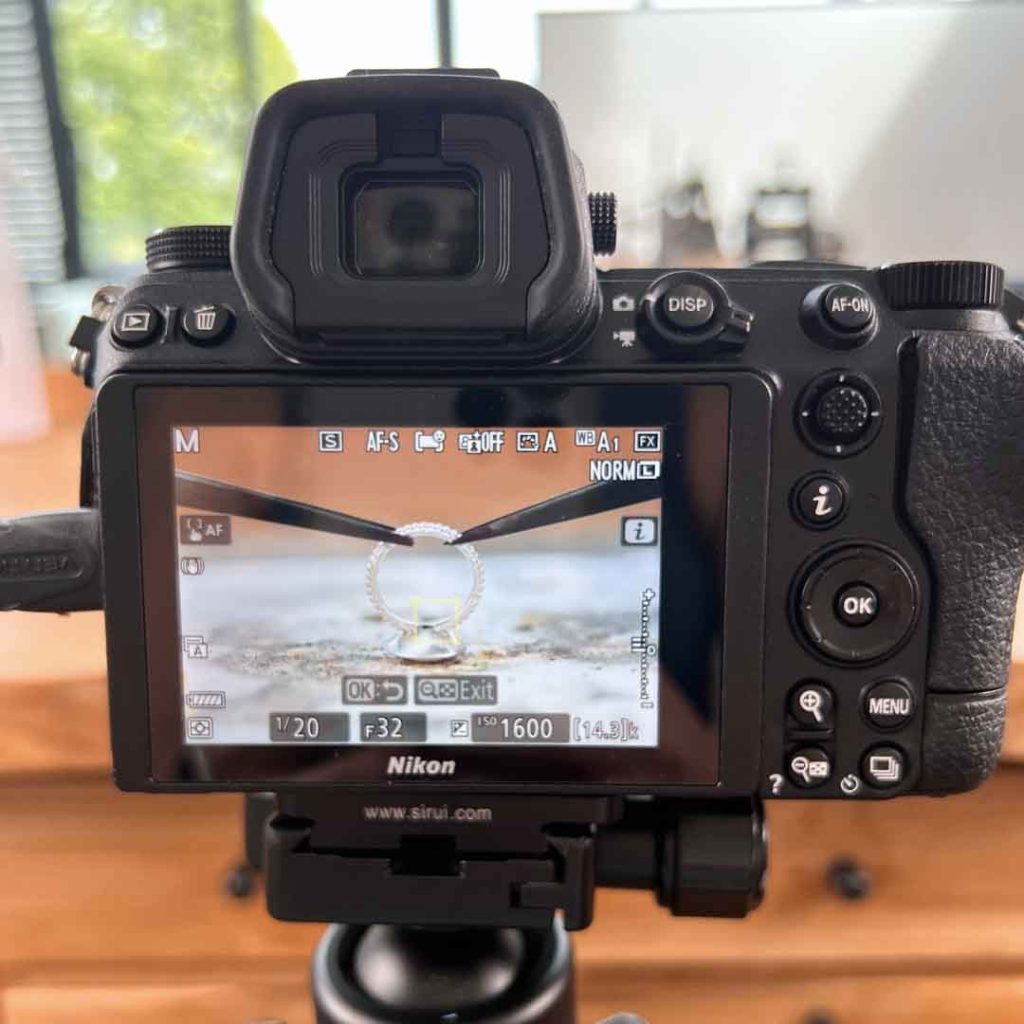
Crystal Clear Videography

With exceptionally close up videography to show you nitty gritty stuff, full screen shots to help you understand scale and how we’re using the tools, and our obsessive commitment to never meandering off camera. We’ve got you covered.
Detailed Explanations

As with any jewellery, it’s important to understand the small details. In order to truly “get it” though, we have to understand not only the how, but also the why. We’re also pretty keen on sharing what not to do too – it does come in pretty damn handy!
Full Colour handouts

As well as creating hours of waffle-free videos, we’ve also put together a detailed handout with over 50 pages of glorious full-colour photos – so you can get the practice you need even when not online. Sorry to break it to you, but this one is going to really need it!
What do we get as a member of the
Metalsmith Academy?
Join monthly for only $47 per month, or save on two months’ membership fees by joining annually for $470 per year. You’re free to cancel your subscription at any time, and it’s entirely drama-free to do so!
Frequently Asked Questions
As many times as you like as long as your subscription is active
Yes, you will need specific tools for this class. We have included a basic tool list on this page with links to products we used. You will not need all the tools mentioned. As always, Lucy shows more than one way to achieve a specific outcome. Please do not purchase tools until you have watched the classes.
Unfortunately, we can’t provide a specific answer to that question. It depends on the tools you decide to purchase and the quality. We try to include as many options as possible in our classes so that students can make choices based on their budget, but we will be honest, tools are not cheap.
The videos are only playable through the website and so are not downloadable.
Absolutely you can! It would be pretty tough to work with your laptop on your workbench.
If you do want that little extra support, don’t worry at all – that is one of the main reasons why we launched our membership. Lucy, Vennice and the team will be active in the forums daily to help with any problems you might be having with the classes.
This class is a little more advanced. We recommend starting out with the saw pierced pendant class as a first step into metalsmithing.
Yes, all our videos have automatic closed captions in English enabled as an option.
You’ll have access to the video portion of the class for 1 year, however the downloadable handout is yours to download and keep forever. Please note that the handout must be downloaded within the 1-year access period.
As there is no access to our community forums as part of individual classes, Lucy will not be available to answer questions relating to the class. She has, however, designed the class so that there should be no questions left to ask. Due to time constraints, Lucy is not able to answer questions on classes via email, or social media messaging. If you do think you would prefer personal support, please select the option to join the Metalsmith Academy. Lucy is active in the forums there every single day.
If you have not managed to complete the standalone class within a year, you will have an option to extend the class another year for $20.
READY TO GET STARTED
JOIN THE METALSMITH ACADEMY AS AMONTHLY MEMBER
-
Access to all online classes
-
Community forums
-
Win prizes and stay motivated with our Creative Kickstarter challenges
-
Support and help from Lucy and Vennice Personally
READY TO GET STARTED
JOIN THE METALSMITH ACADEMY ASAN ANNUAL MEMBER
-
Access to all online classes
-
Community forums
-
Win prizes and stay motivated with our Creative Kickstarter challenges
-
Support and help from Lucy and Vennice Personally